Create a Form to Enter Google Sheets Data in 7 Steps
Obviously, Google Sheets is great for collaboratively managing all sorts of data. There are big downsides here too though, especially if you’re working at scale. One solution is using a form to enter data into Google Sheets.
Today, we’re going to look at exactly how you can do this in Budibase.
There are a bunch of other ways you could do this too, of course. We’re biased, but we think Budibase is the best option. We also think that once you hear what we have to say, you’ll definitely agree.
But first, let’s check out a bit of background information.
Why would you build a form for entering Google Sheets data?
This is a reasonable enough question. After all, it’s perfectly easy to add or edit rows in a spreadsheet.
What’s the point in adding extra complexity with a dedicated Google Sheets data entry form?
There are a bunch of situations where spreadsheets alone fall short. We won’t bore you with every single one, but instead, let’s take a couple of quick examples.
First, say you wanted to manage sign-ups for a meeting or event. You can’t just let each participant add their own details, because they’d then be able to see all of the other attendees.
Or, they might accidentally do something they’re not meant to, like delete a row. A data entry form for Google Sheets helps to prevent this.
Similarly, what if you had a whole army of admin staff working on a lot of data at the same time?
Real-time collaboration is cool and everything, but it can also get very messy, very fast. Data entry and update forms are critical for ensuring accuracy and error prevention.
Check out our ultimate guide on databases vs spreadsheets for more details.
Why would I build forms for Google Sheets with Budibase?
Another excellent question!
No doubt, you’re well aware that Google offers its own solutions here. So, you could build a form on a separate sheet and use built-in functions and Google Apps script code or other script editors to add rows to your dataset.
Alternatively, you could do something similar with Google Forms - or other Google Drive integrations. You might also like our guide to data access control .
There are three big problems here though:
- Google’s solutions only really let you add data, not update existing rows.
- Neither of these options looks particularly professional.
- You can get a better result with Budibase, with much less effort.
The last point might surprise you. It’s a very big claim, to be fair.
So, how exactly is this possible?
Our dedicated Google Sheets data connector
Budibase offers an unbeaten range of dedicated connectors for external data sources. One of these just so happens to be for Google Sheets. All you need to do is sign in with your existing Google account, paste a link to your spreadsheet, and you’re ready to go.
Then, you can use Budibase to automatically generate a fully functioning CRUD app .
We’re going to look at the full details in a second, but the whole process won’t take you any more than a couple of minutes. You’ll also enjoy far superior functionality, customization, data validation, and flexibility than you would with an all-Google solution.
Simply connect a sheet and create your custom UIs and business processes.
We’ll return to some of the more specific features of Budibase that make it the ideal solution for using a form to enter data into Google Sheets a little later.
For now, though, let’s jump into the practical stuff.
Building Google Sheets forms: step-by-step
We do have a couple of obvious prerequisites. We can safely assume that you have a Google account already, along with a spreadsheet you want to manage. You’ll also need to sign up for Budibase, of course. You can use the same email address for this.
With that out of the way, here are the specific steps you can follow to start using a form to enter data to Google Sheets.
1. Create a new app & select Google Sheets as your data source
Unsurprisingly, our first step is to start a new app project. So, once you’re signed in to Budibase, hit Create new app, and then choose Start from scratch. At this point, you’ll be prompted to choose a name and URL:
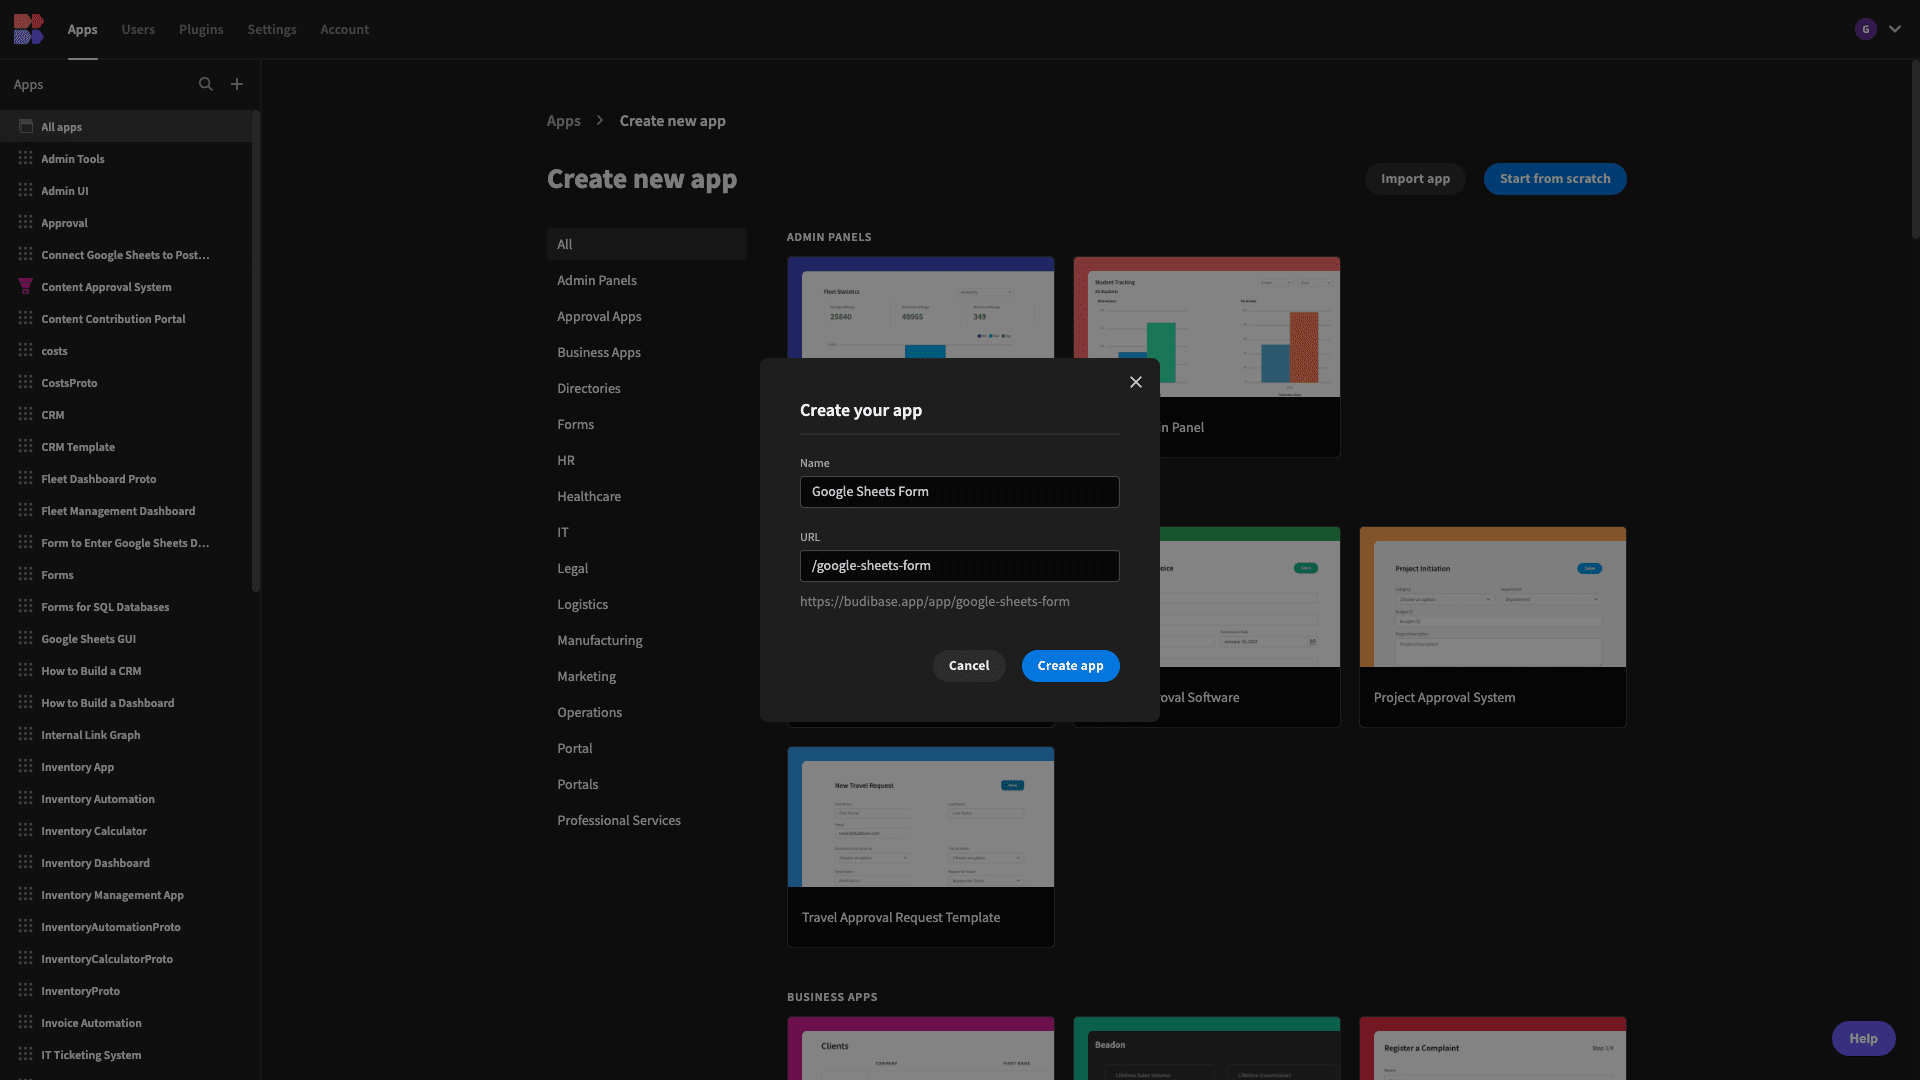
Hit Create app when you’re ready. Next, you’ll see a modal with a list of all of the data sources you can choose.
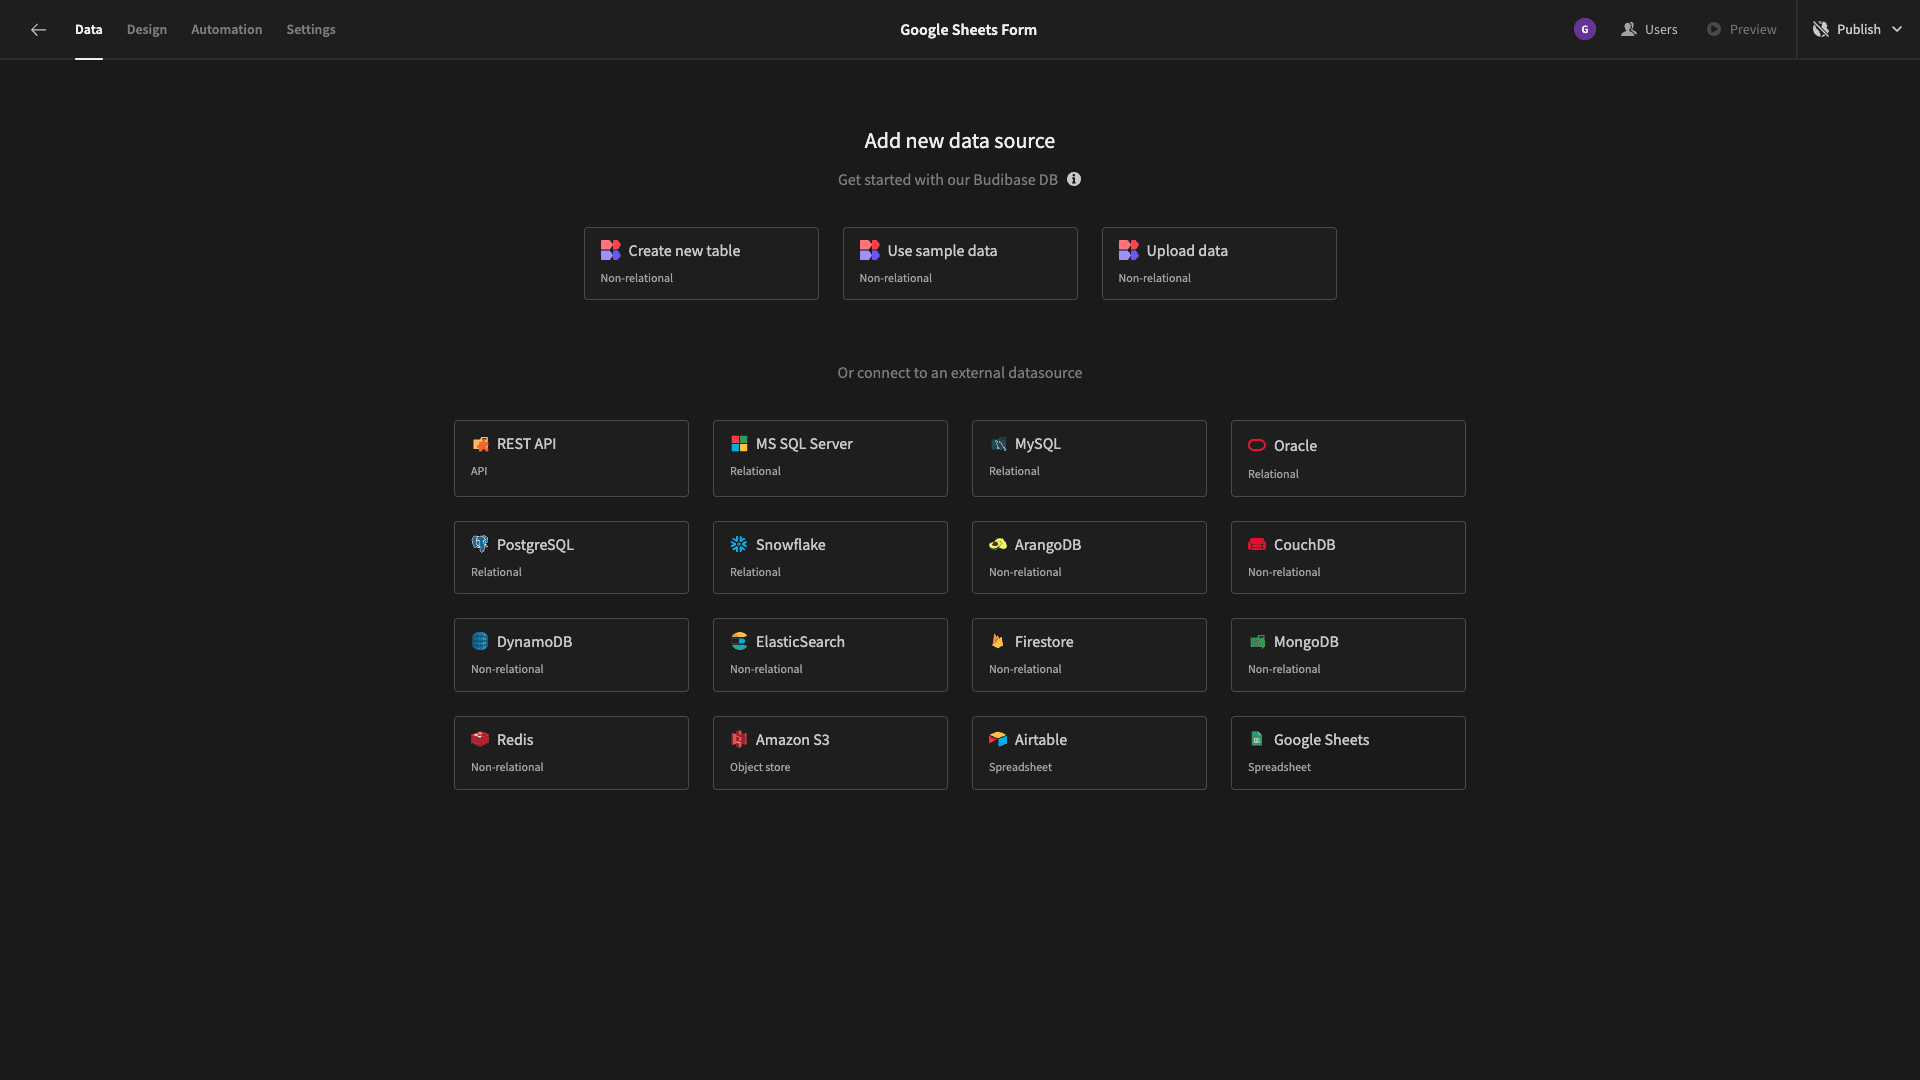
Pick Google Sheets. No surprises here.
You might also like our tutorial on how to make an app from an Excel spreadsheet.
2. Configure your data connection
With your app created, the next thing you’ll be prompted to do is sign in with Google to connect your accounts. We’re then asked to input the URL of the Google Sheets file we want to connect to:
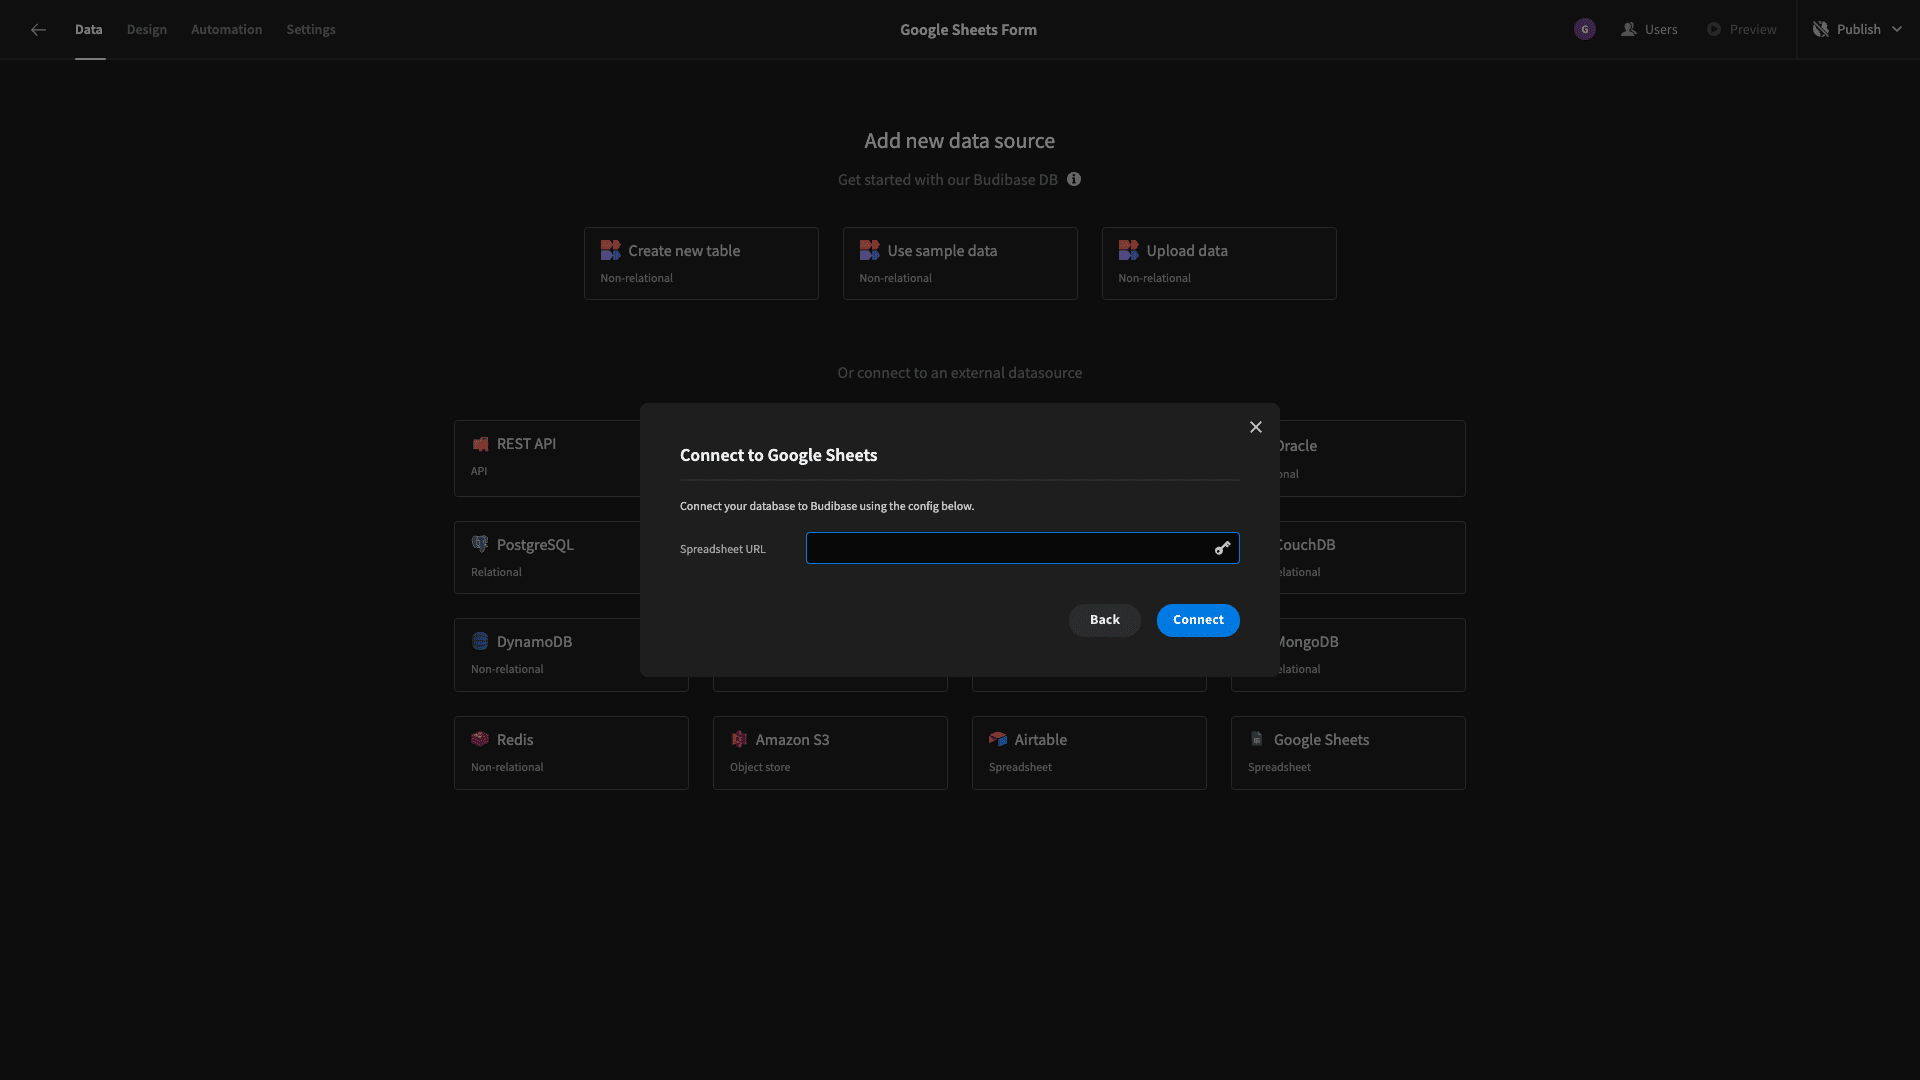
Next, we need to choose which individual sheets from the file we want to fetch and pull into Budibase:
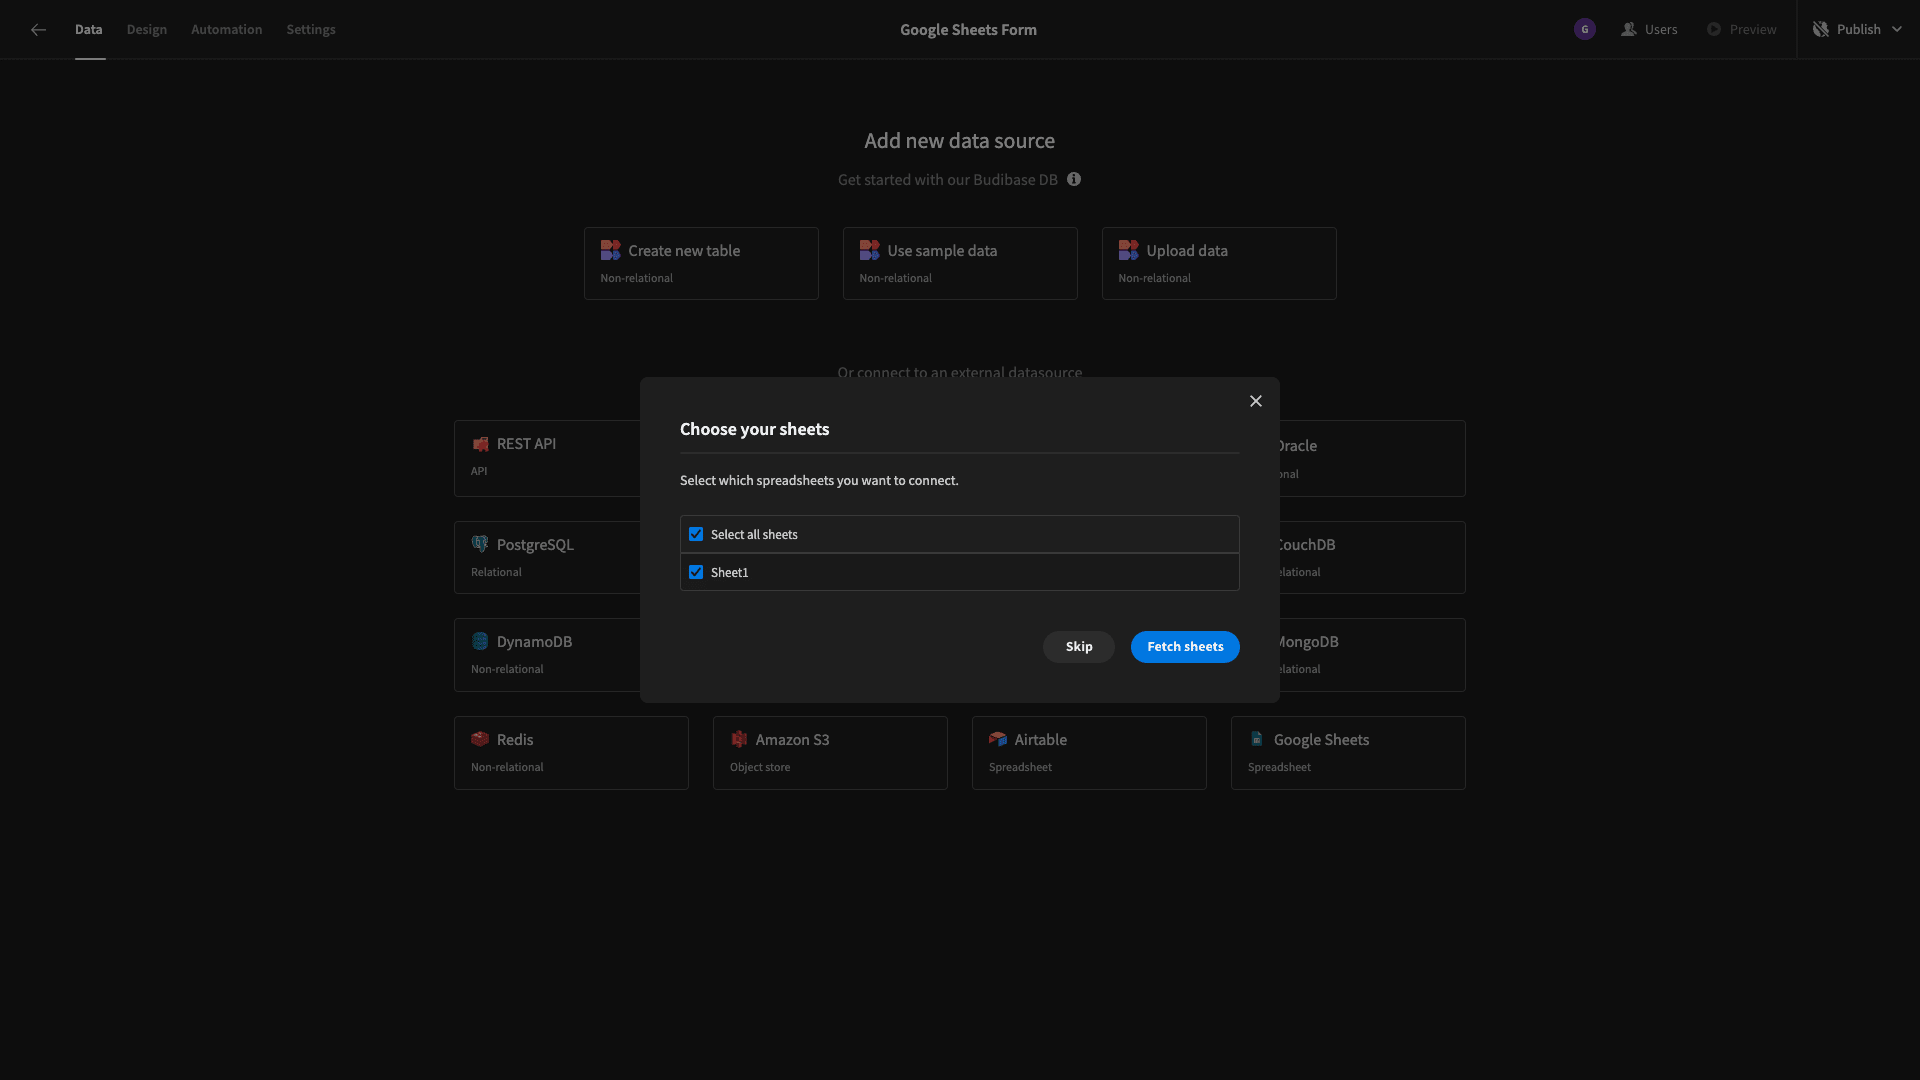
Straight away, we can edit our data in a spreadsheet-like interface in Budibase’s back end:
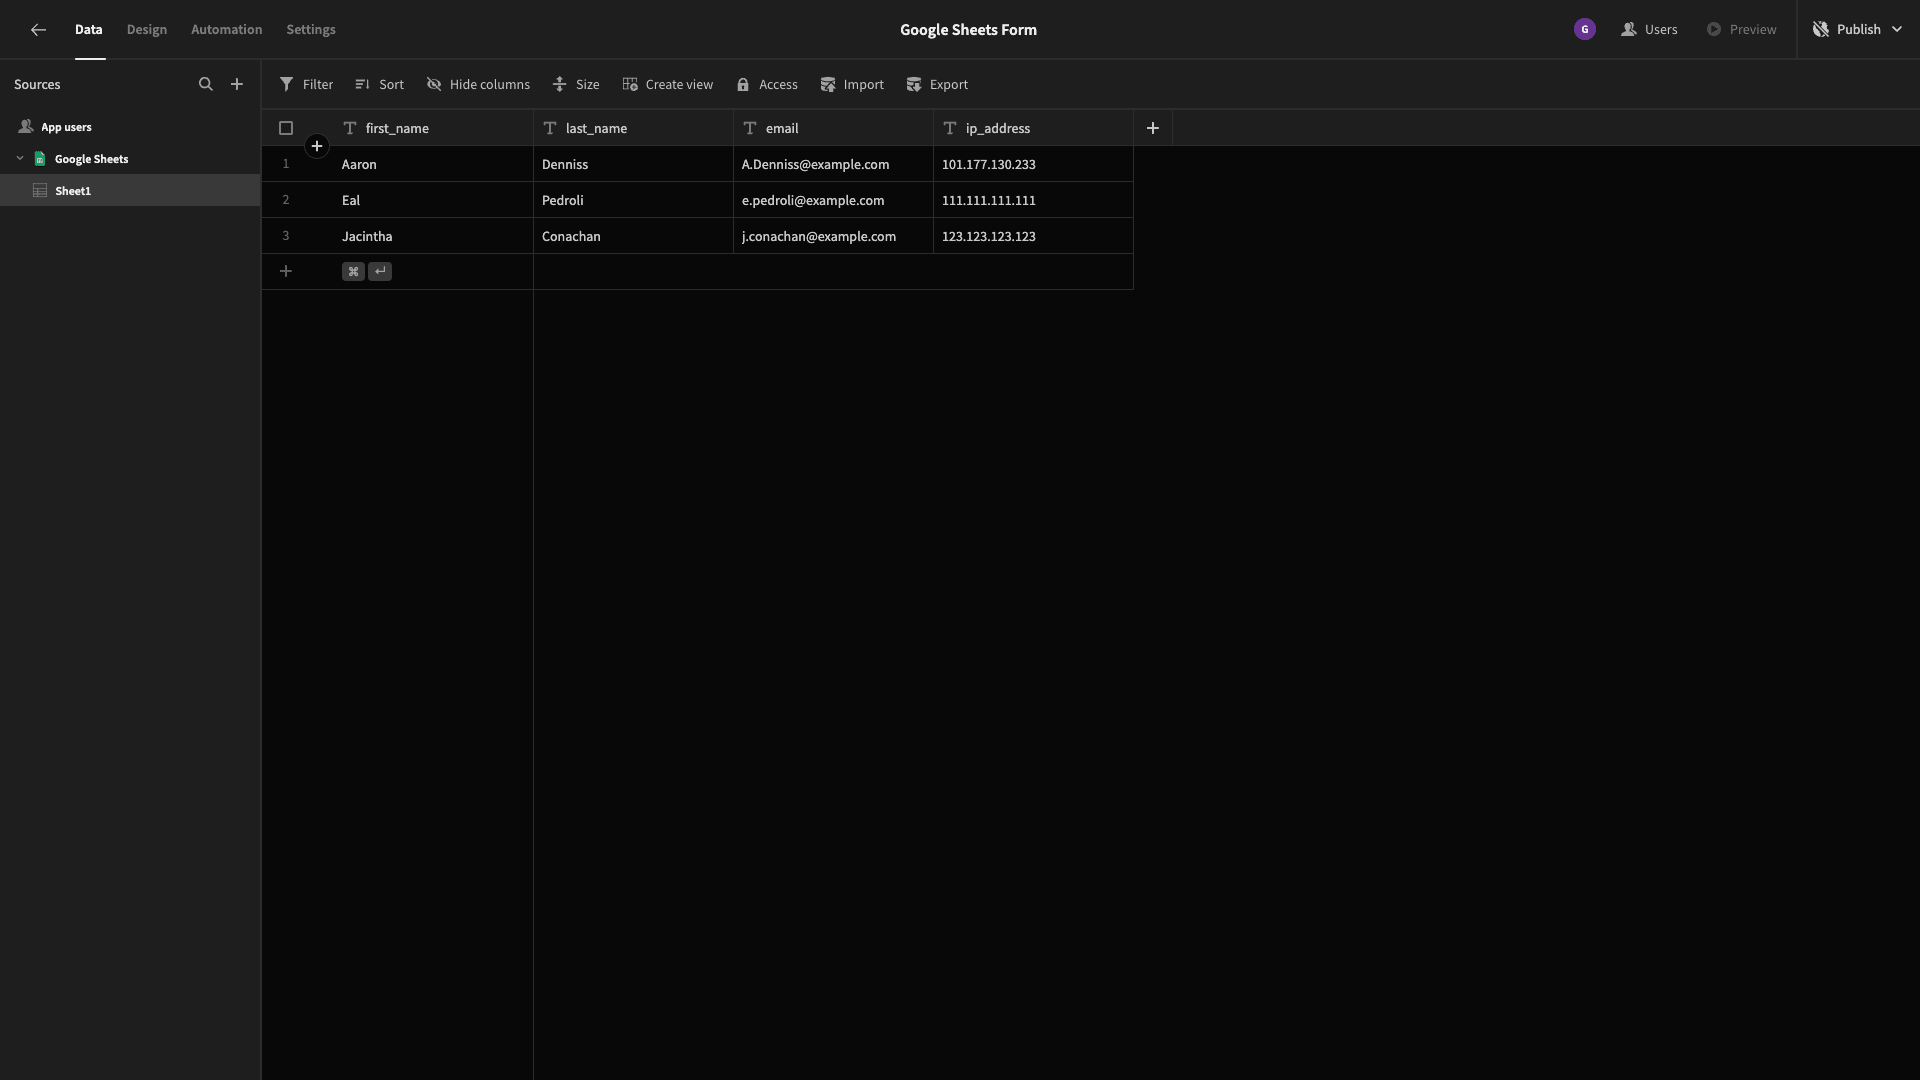
We can also edit the schema of our sheet, including adding JavaScript formula variables or relationships to other tables - as well as creating custom queries to manipulate our data.
3. Autogenerate CRUD screens
Next, we want to start building our forms.
Specifically, we want one form to add new rows to our spreadsheet and another one for updating existing rows. For the second type of form, we’ll also need to provide an interface for users to find the right entries before they can edit them.
Budibase offers you a couple of different options here. On the one hand, you can build your own interfaces from scratch, if that’s what you want to do. We offer a huge range of built-in components, making it easy to build professional apps, with minimal technical skills.
For our purposes today though, we’re going to let our auto-generated CRUD screens do the heavy lifting.
Head over to the design tab at the top of the Budibase builder and hit Add screen on the left-hand side. You’ll then be given a choice to either create a blank screen or to use autogenerated screens:
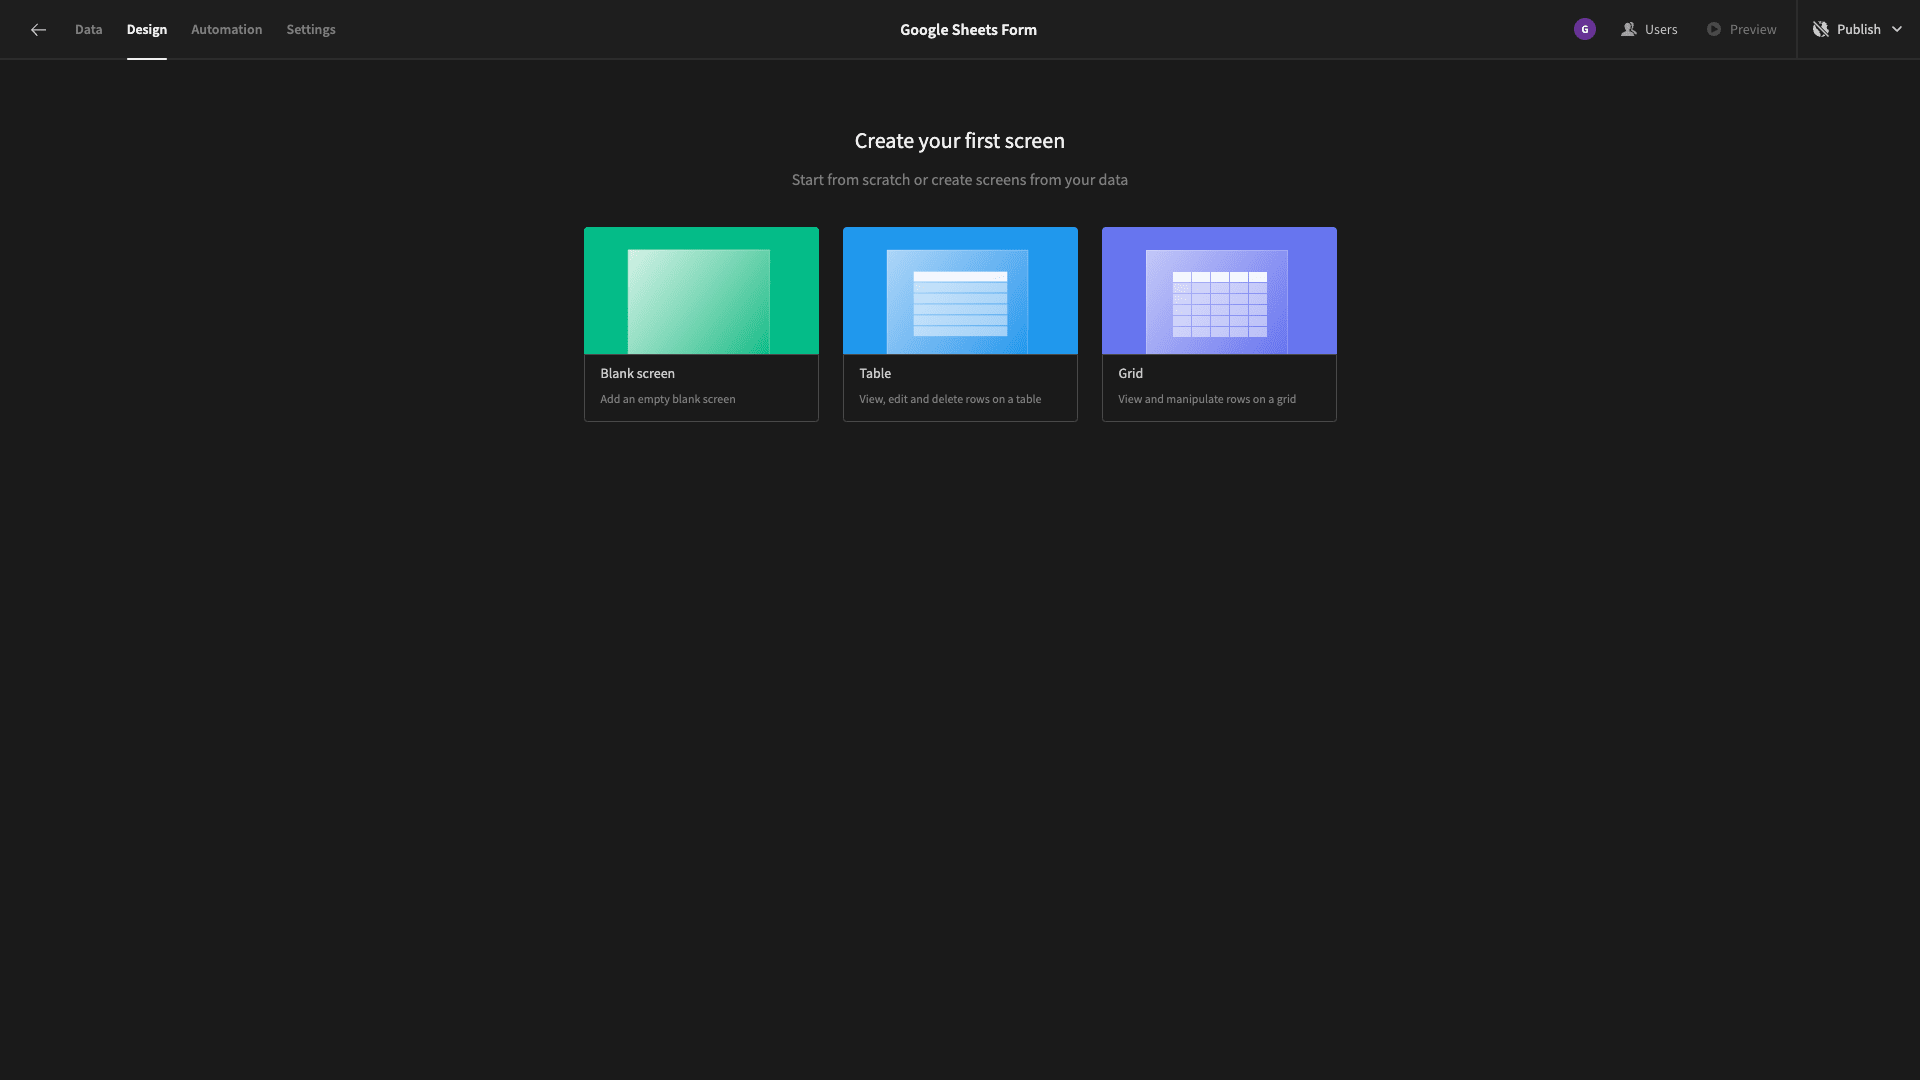
Choose the second option, and hit Continue. You’ll then be asked which data source you’d like to autogenerate screens for:
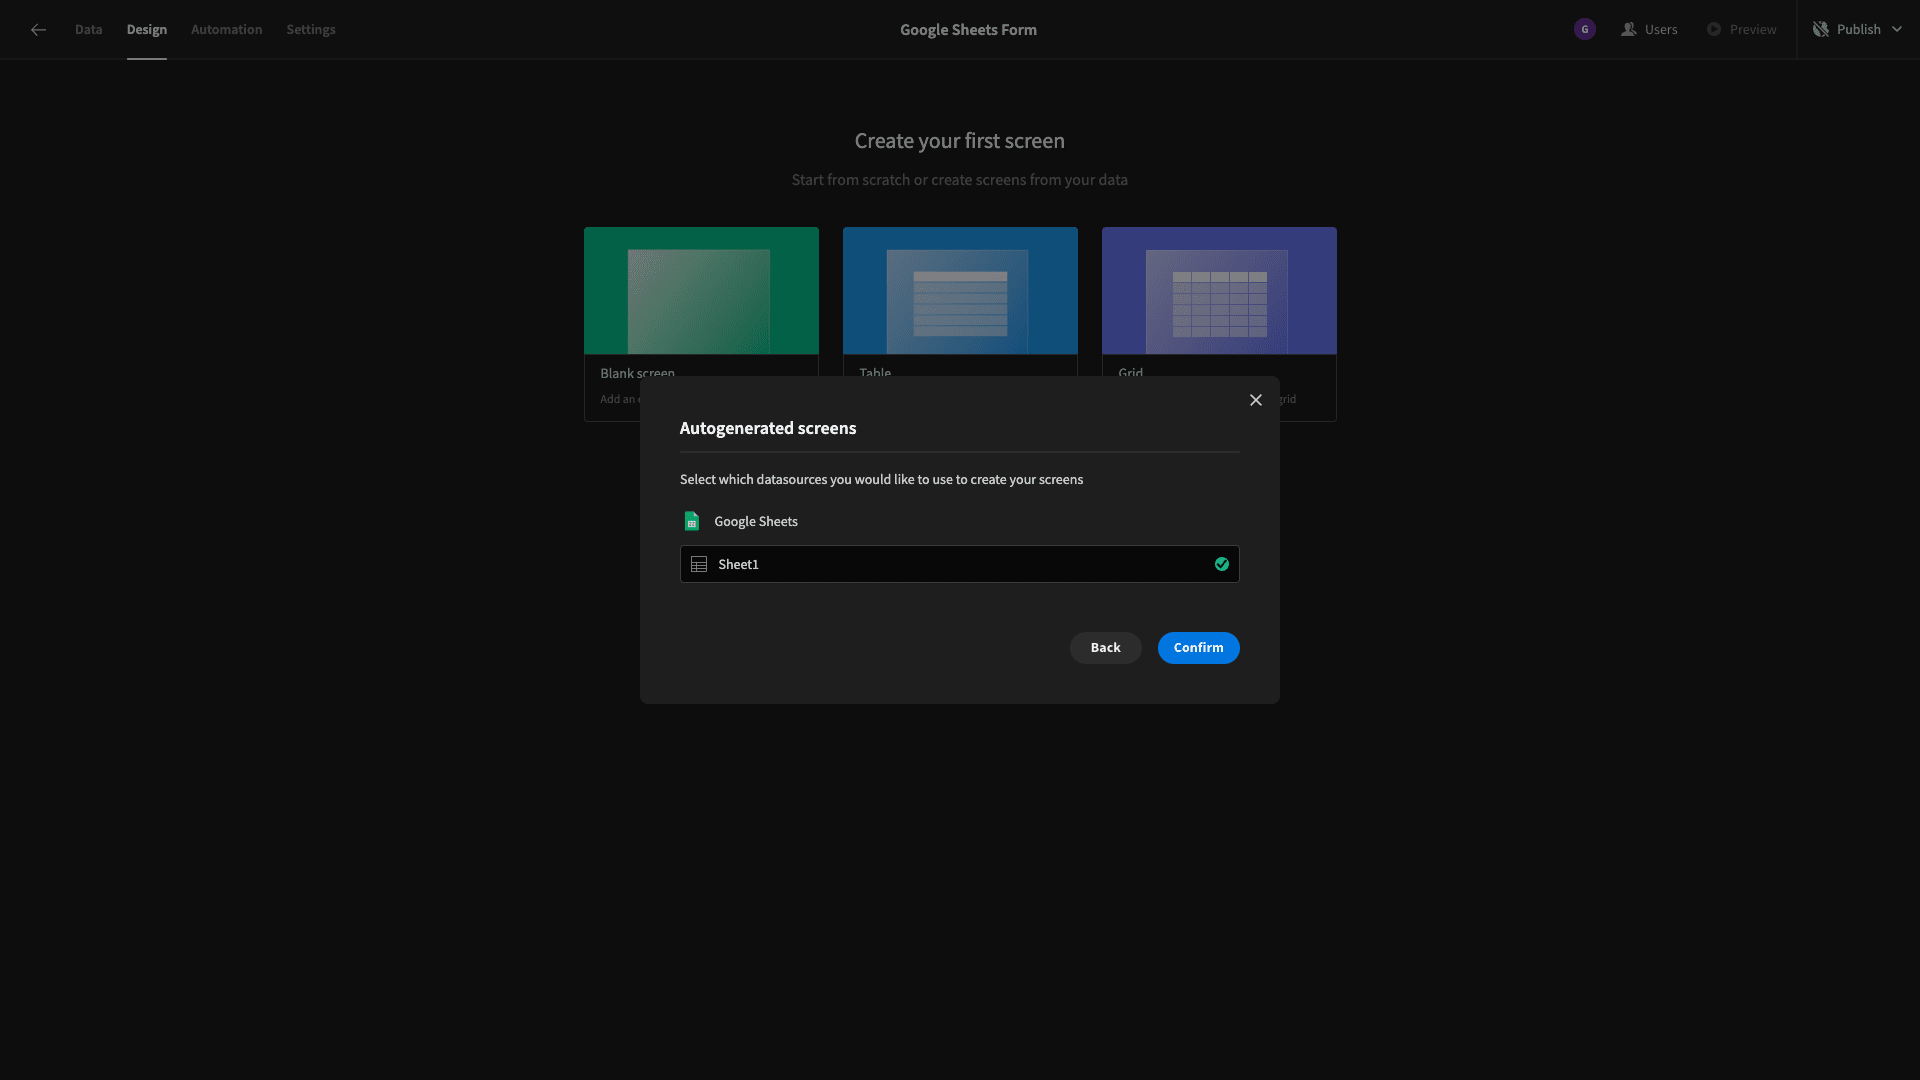
Remember, we only have one sheet in our connected spreadsheet, but if you had more you’d need to choose between them.
Here’s what this will look like:
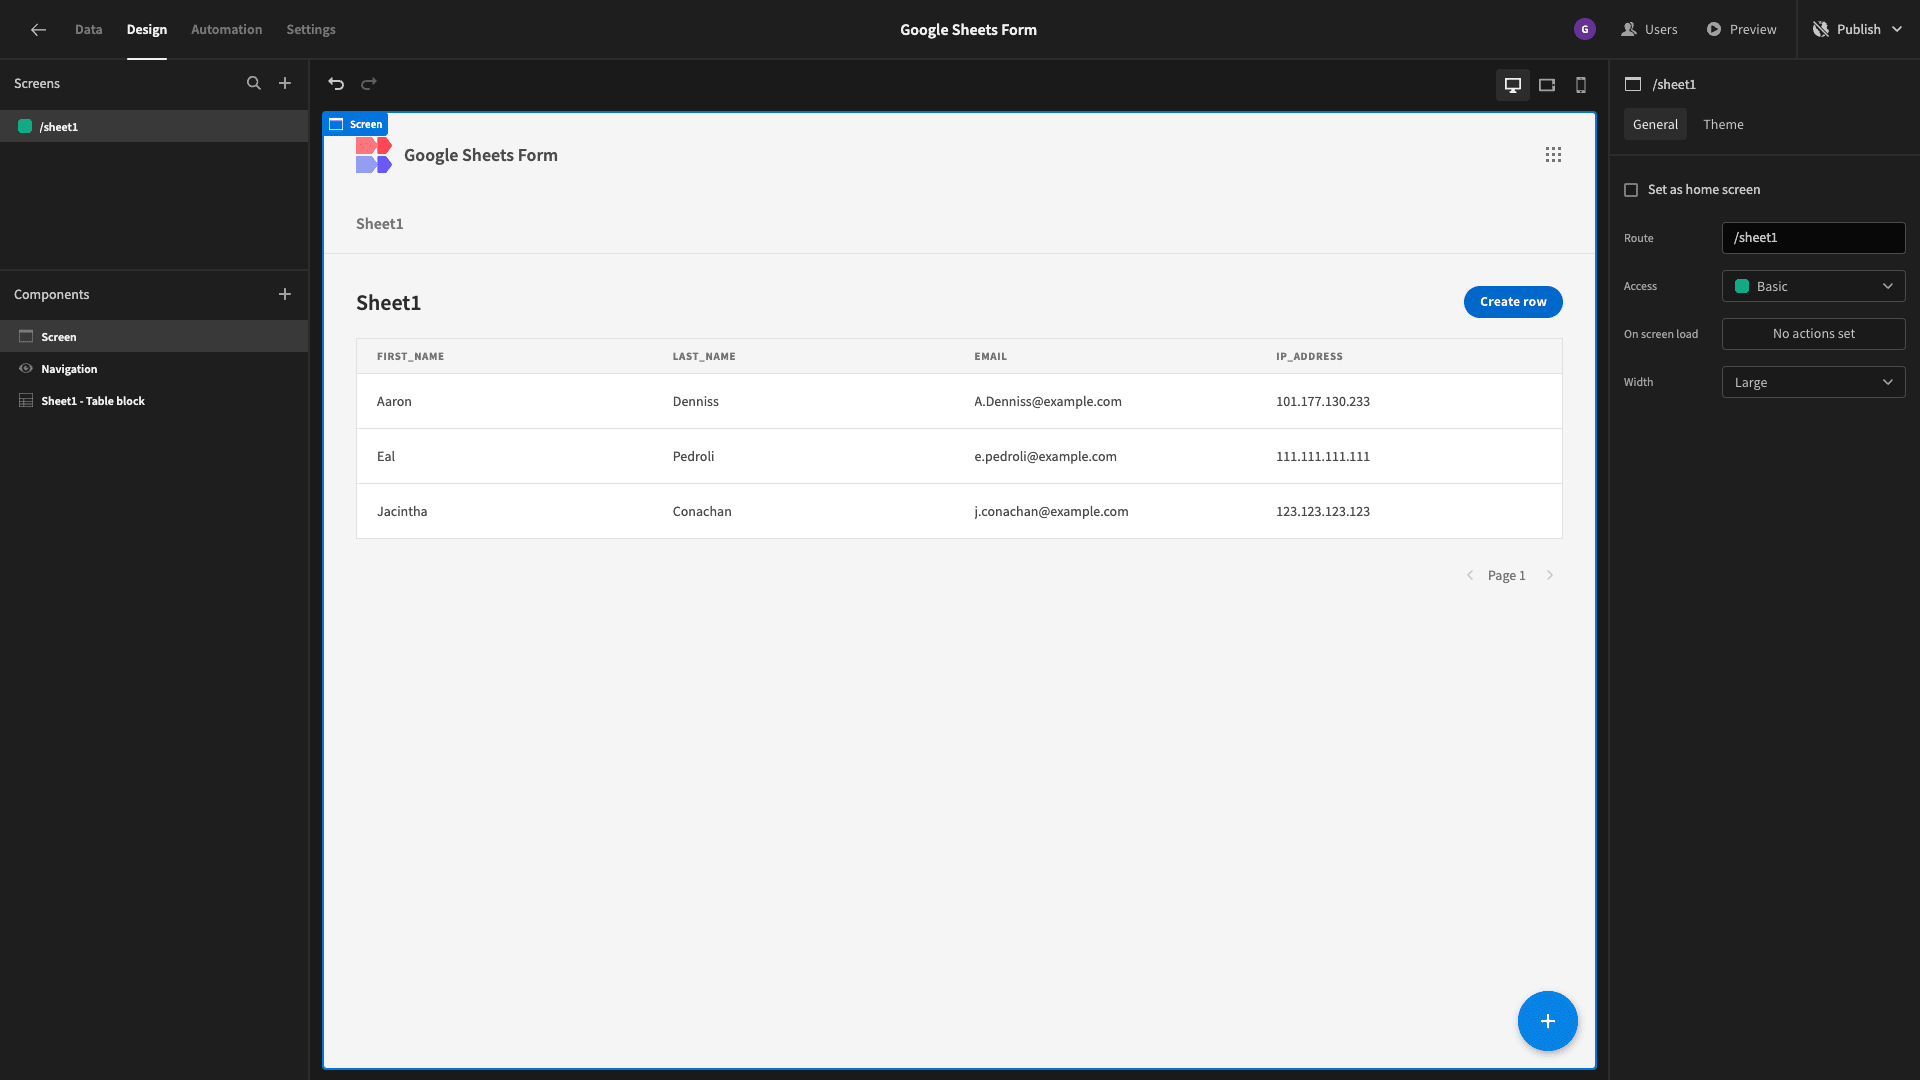
Before we go any further, let’s make sure our app actually works, though. Hit Preview up in the top right corner to open your demo app. First, we’ll try updating a row. Click on any row to open an update form in the side panel:
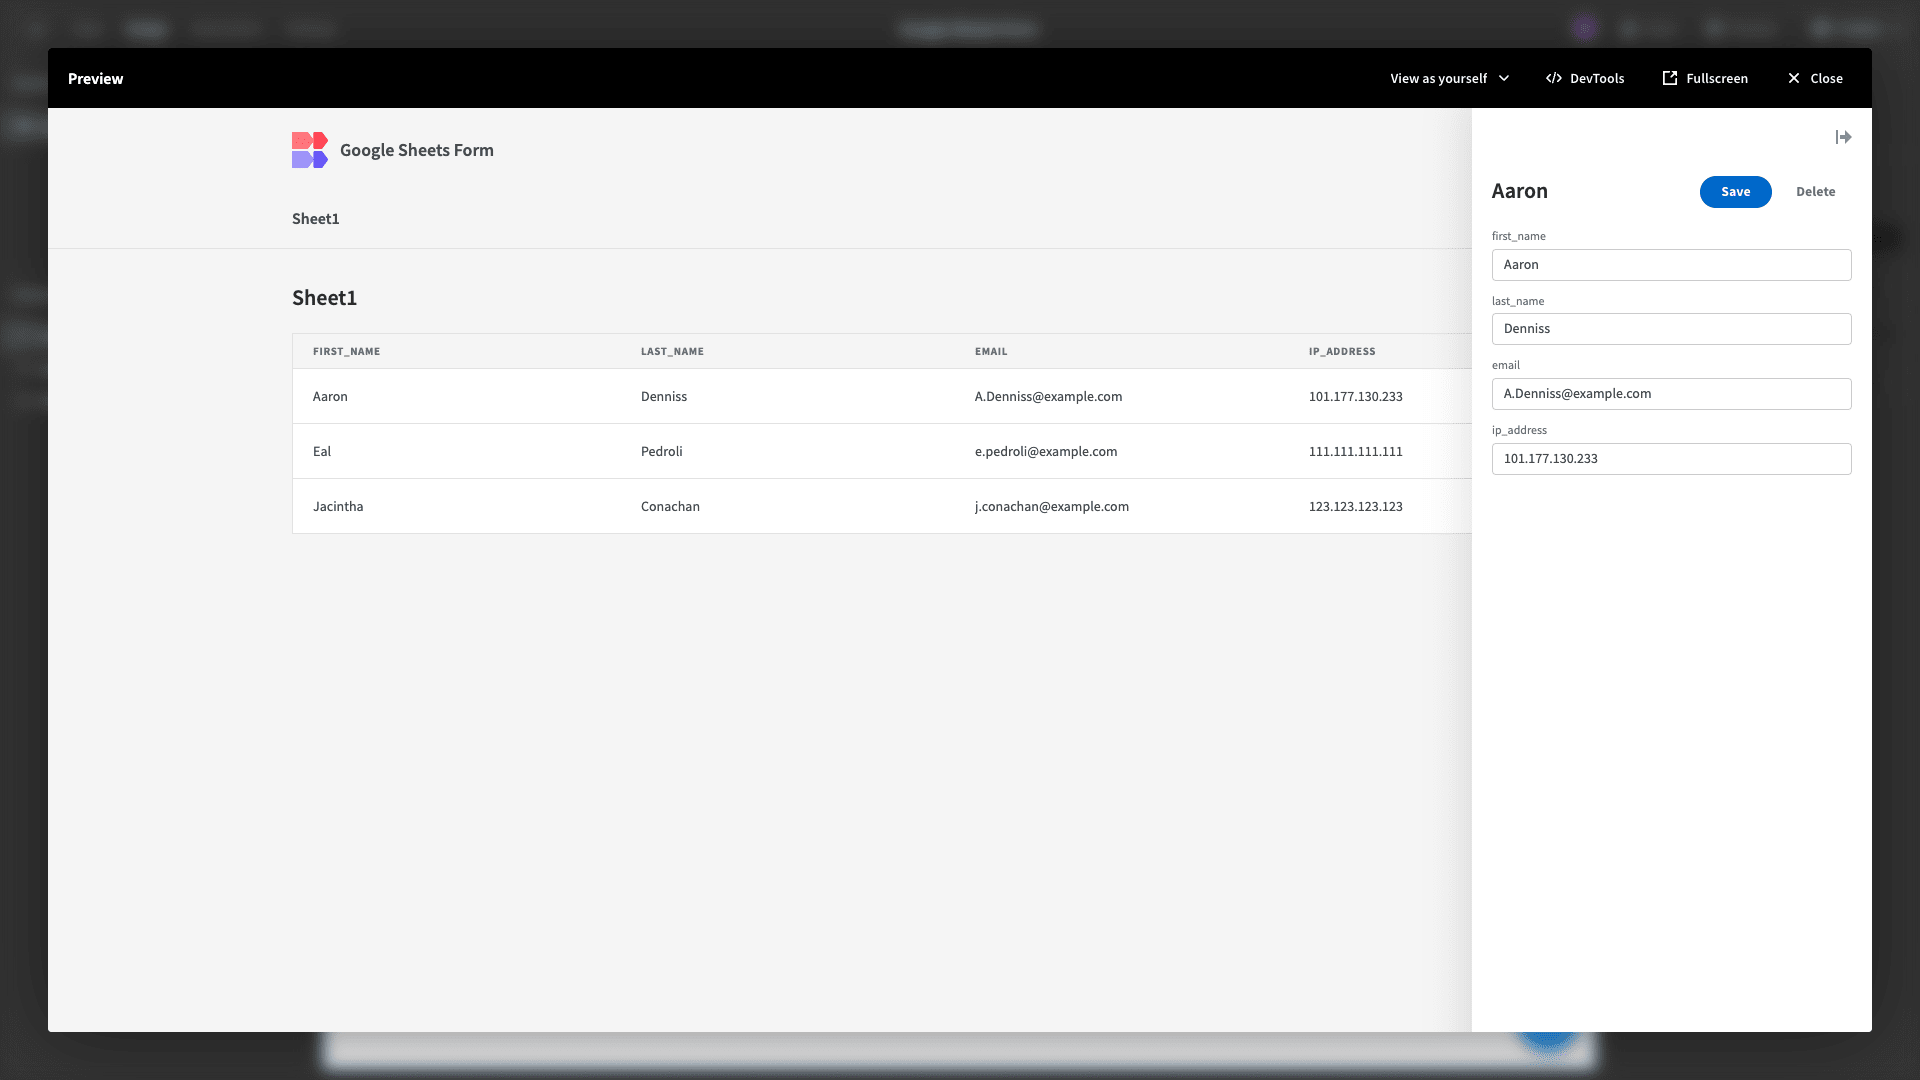
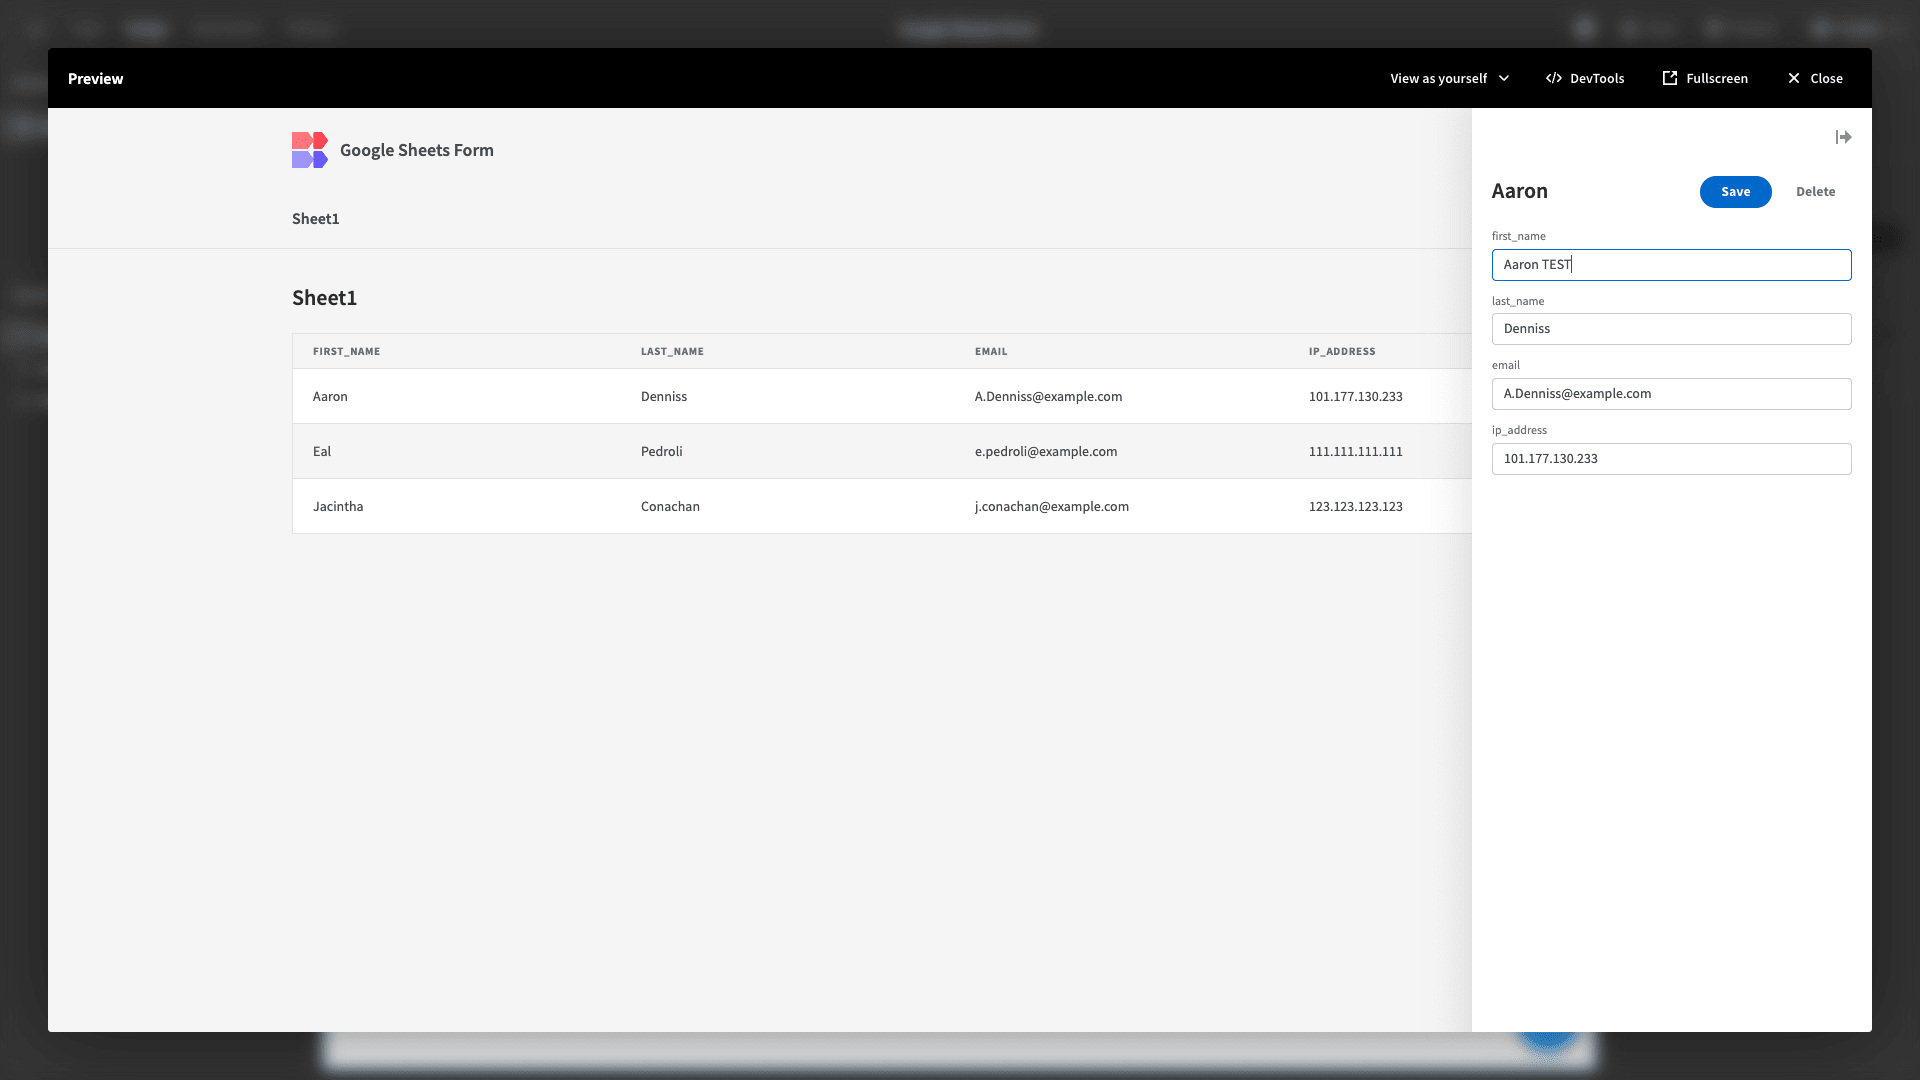
We want to see if changes made in our app are reflected in the connected Google Sheets document, so make a change to one of the attributes. We’ve added the word TEST to the first_name field:
Hit Save and head back to your spreadsheet to confirm the change has been made:
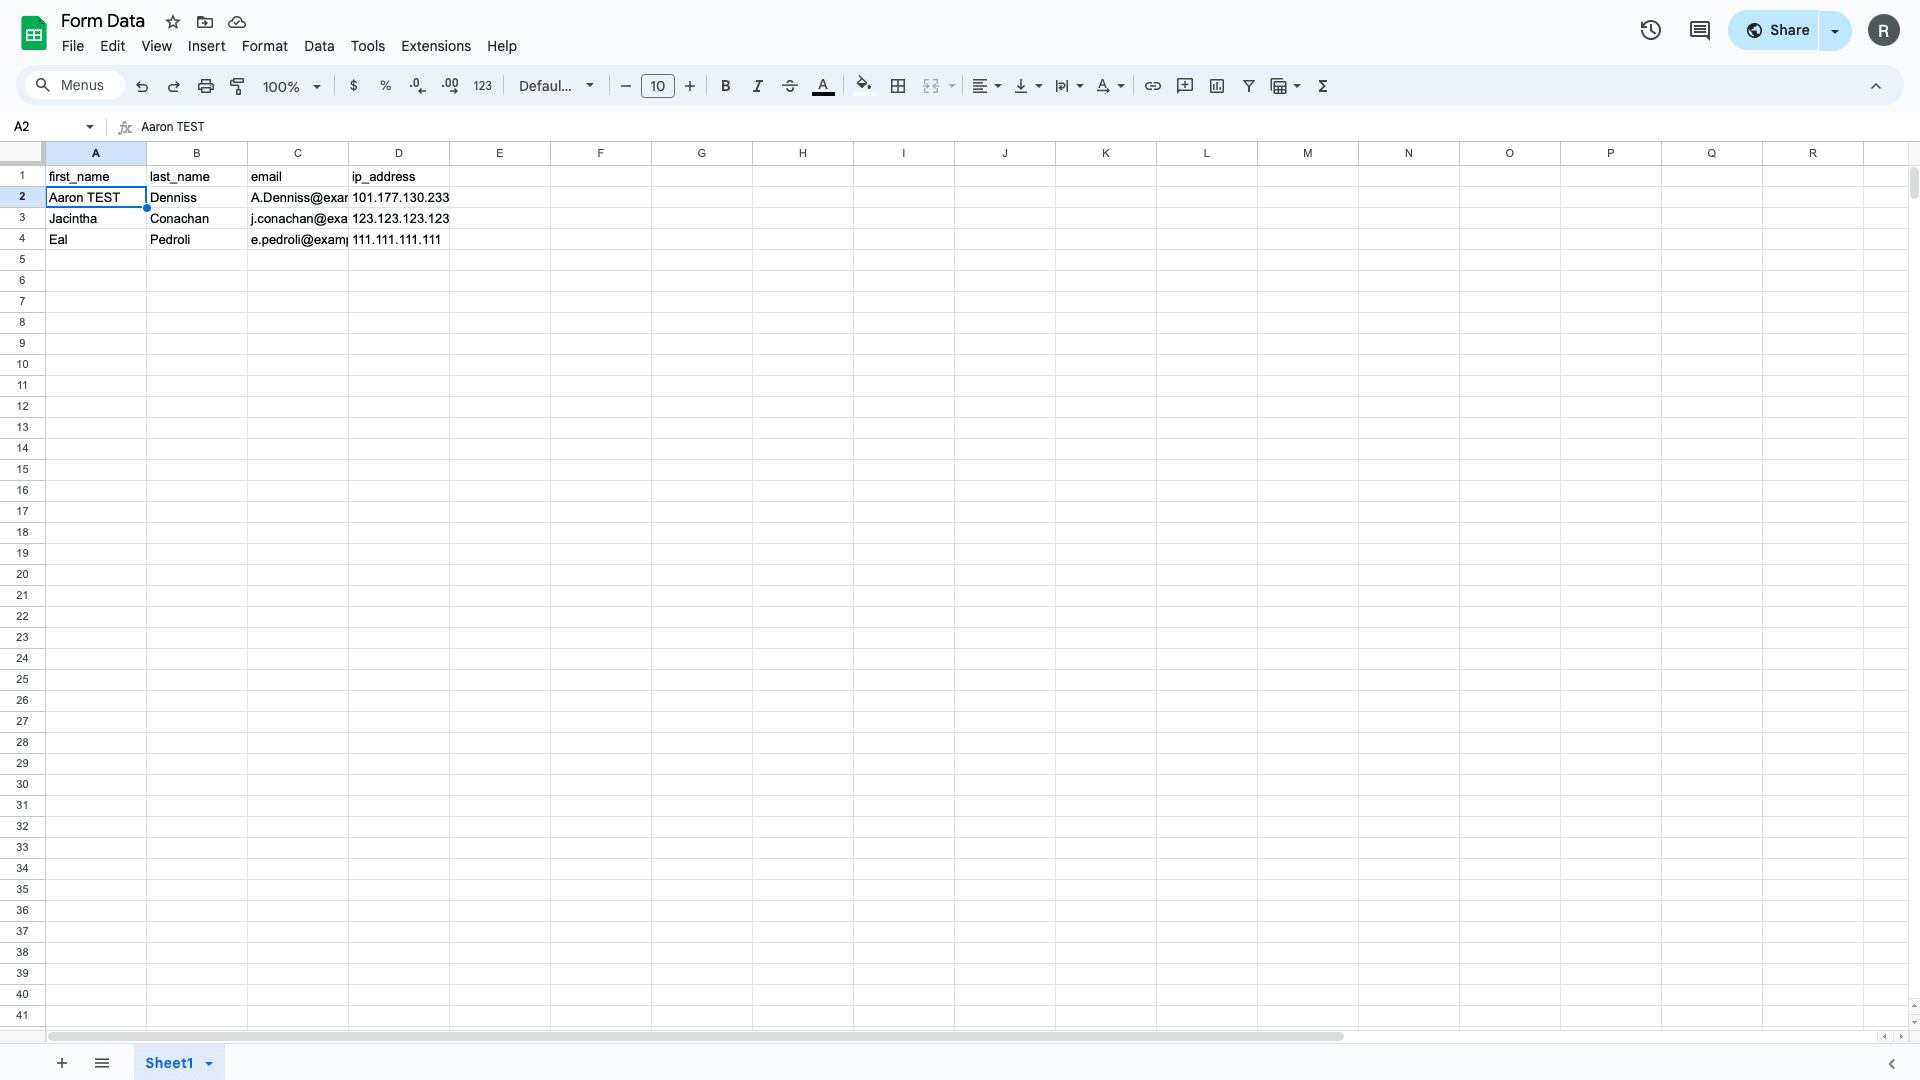
Happy days!
We can repeat the same process for our Create form too. We can also reverse this process - so make a change in your connected spreadsheet and then refresh your Budibase data screen, to confirm the update is reflected.
Now, for really simple use cases, we could use what we have so far as a deployable solution. For example, you might not be too worried about access control or design for your Google Sheets form - in which case you could simply skip to step 7 and publish your app.
But, part of the beauty of Budibase is that we don’t need too much more effort to transform this simple app into something really impressive.
Let’s think about how we could spend a couple of extra minutes really supercharging our forms to enter data into Google Sheets.
4. Build a Google Sheets data entry form
Our autogenerated UI also contains a side-panel form for creating new rows. But, Budibase gives us the option of building something a little bit more advanced too.
We’re eventually going to give different types of users access to different forms, so we want our data entry form to live on a separate screen.
Start by adding a new blank screen:

We’re then prompted to designate a URL slug:
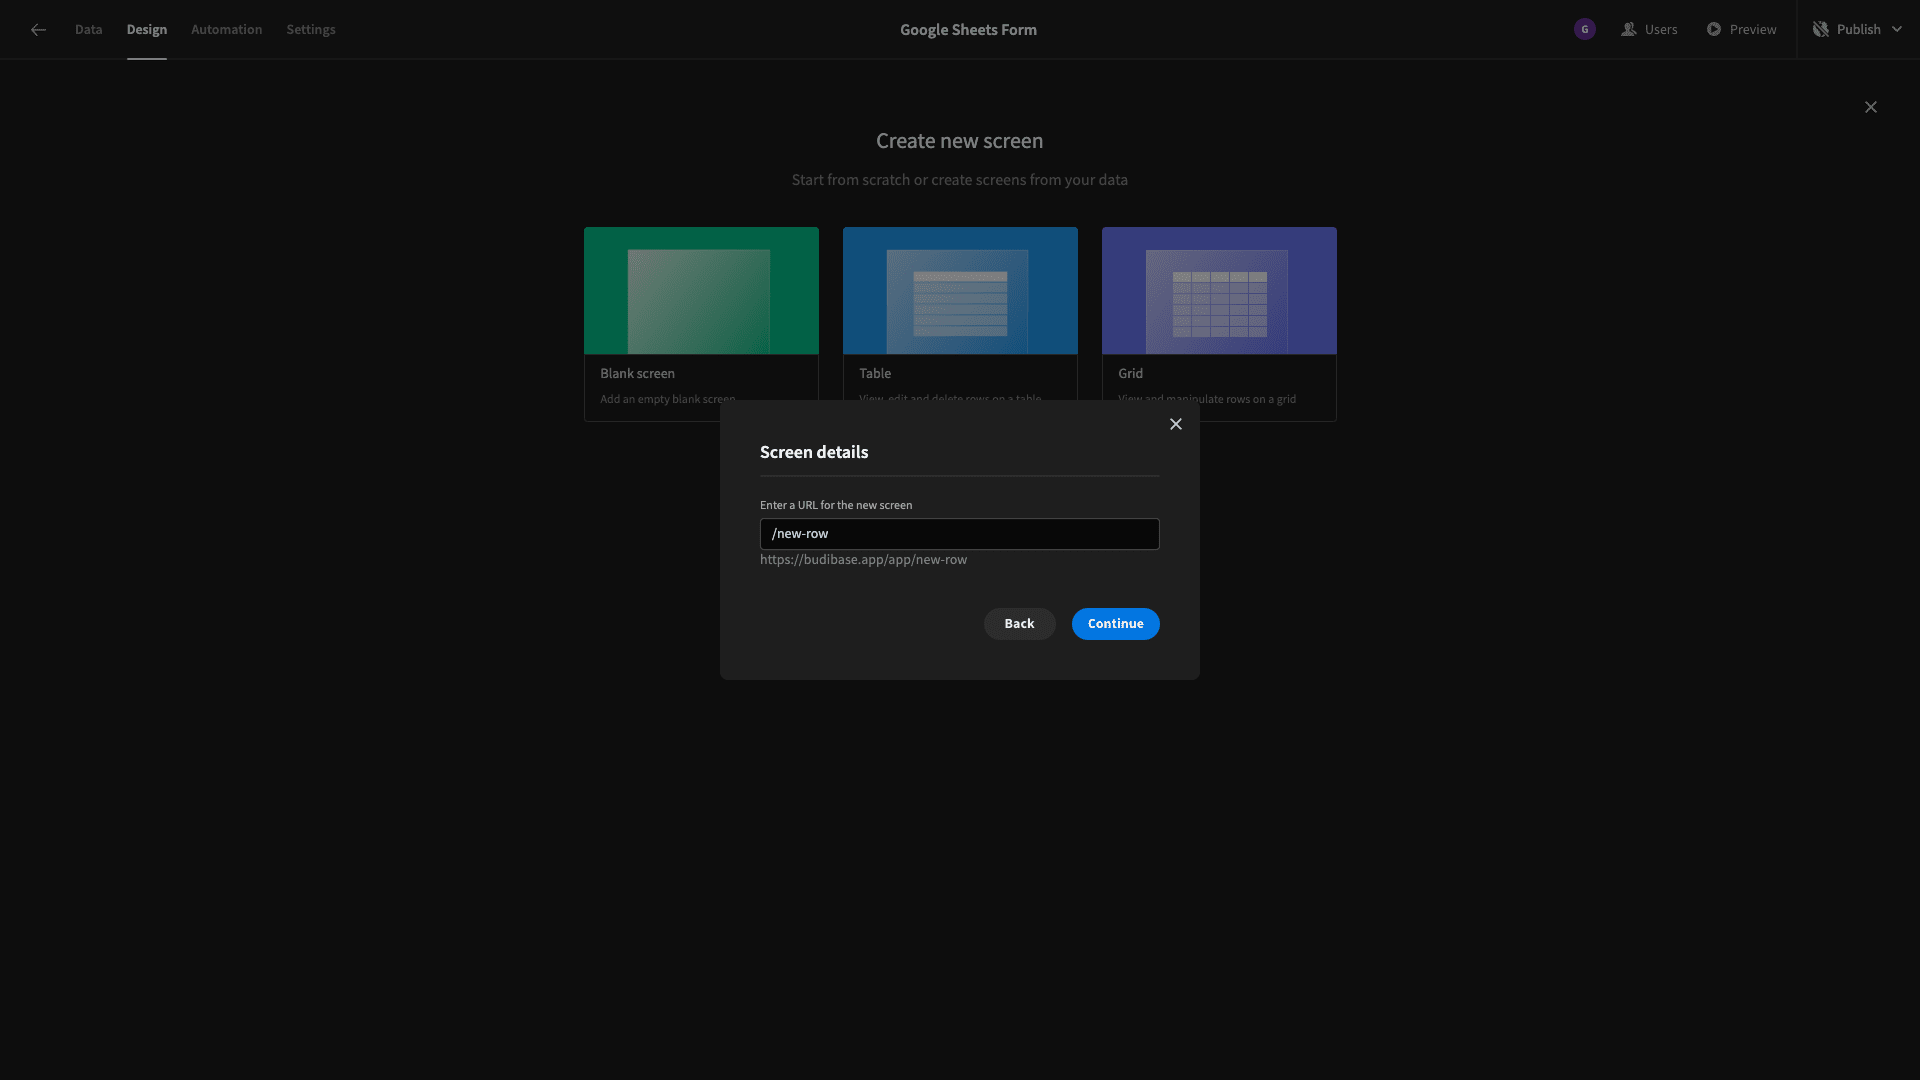
Here’s what this will look like:
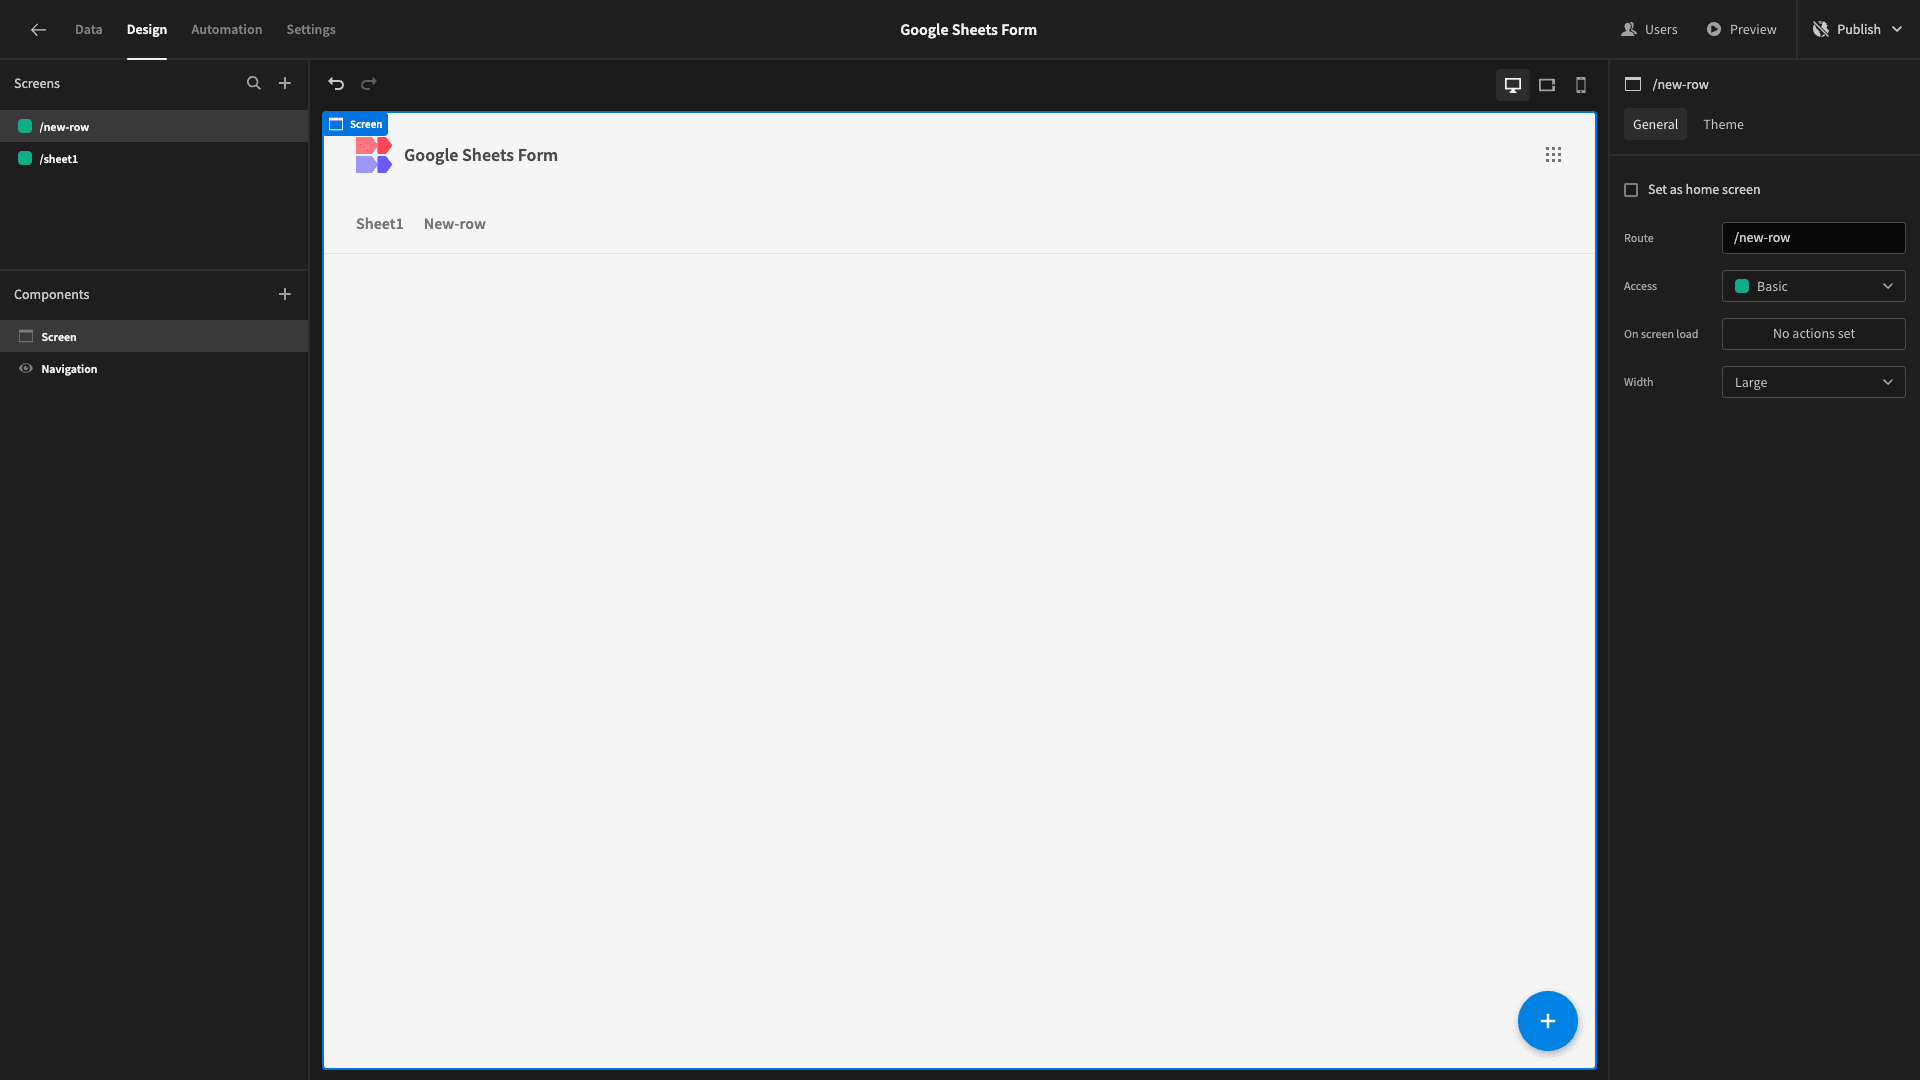
By the end, we want a multi-step form for users to add new rows to our spreadsheet.
We’ll start by adding a multi-step form block. This is a prebuilt set of components that will build a form based on the schema of whichever data source we point it at:
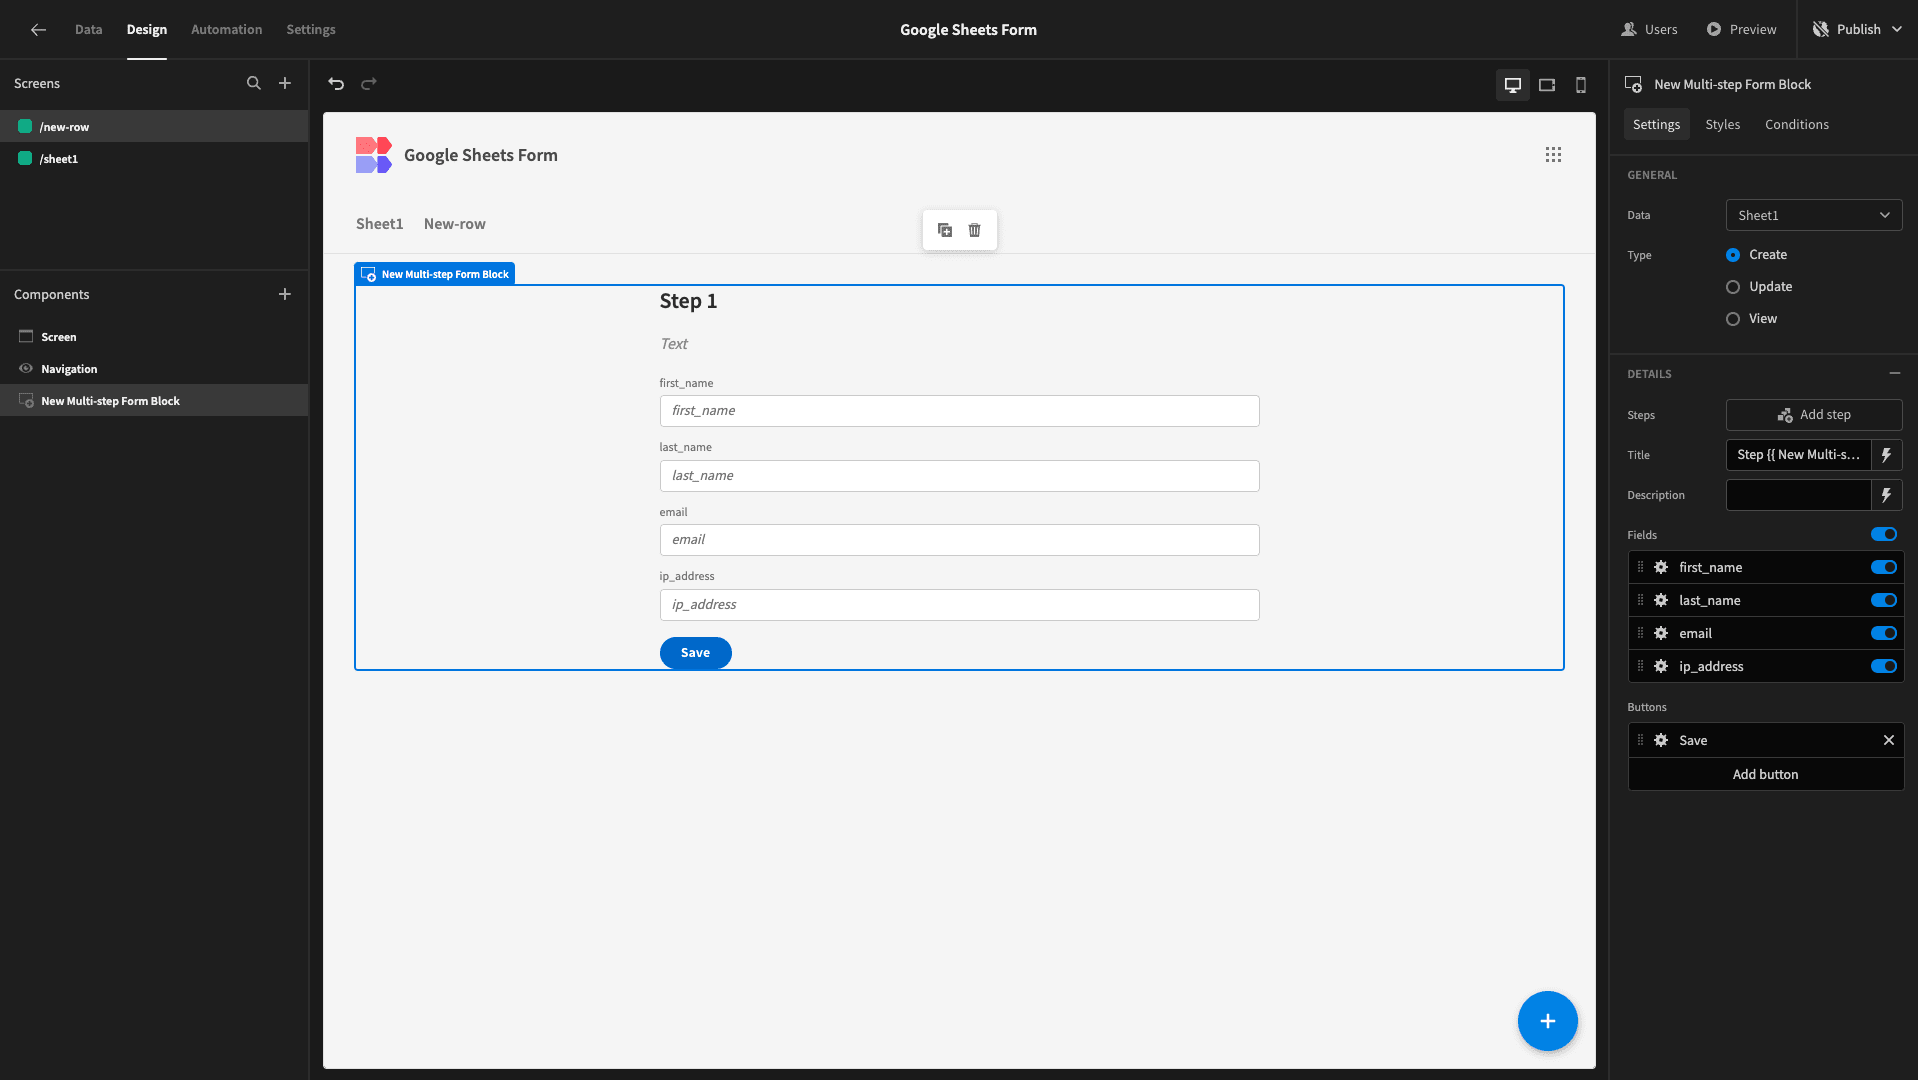
All we need to do is tweak the design to our liking.
The first part of this is arranging our various fields into different steps. By default our form only has one step. We’ll start by selecting the fields we want to appear on this, using the sliders on the right:
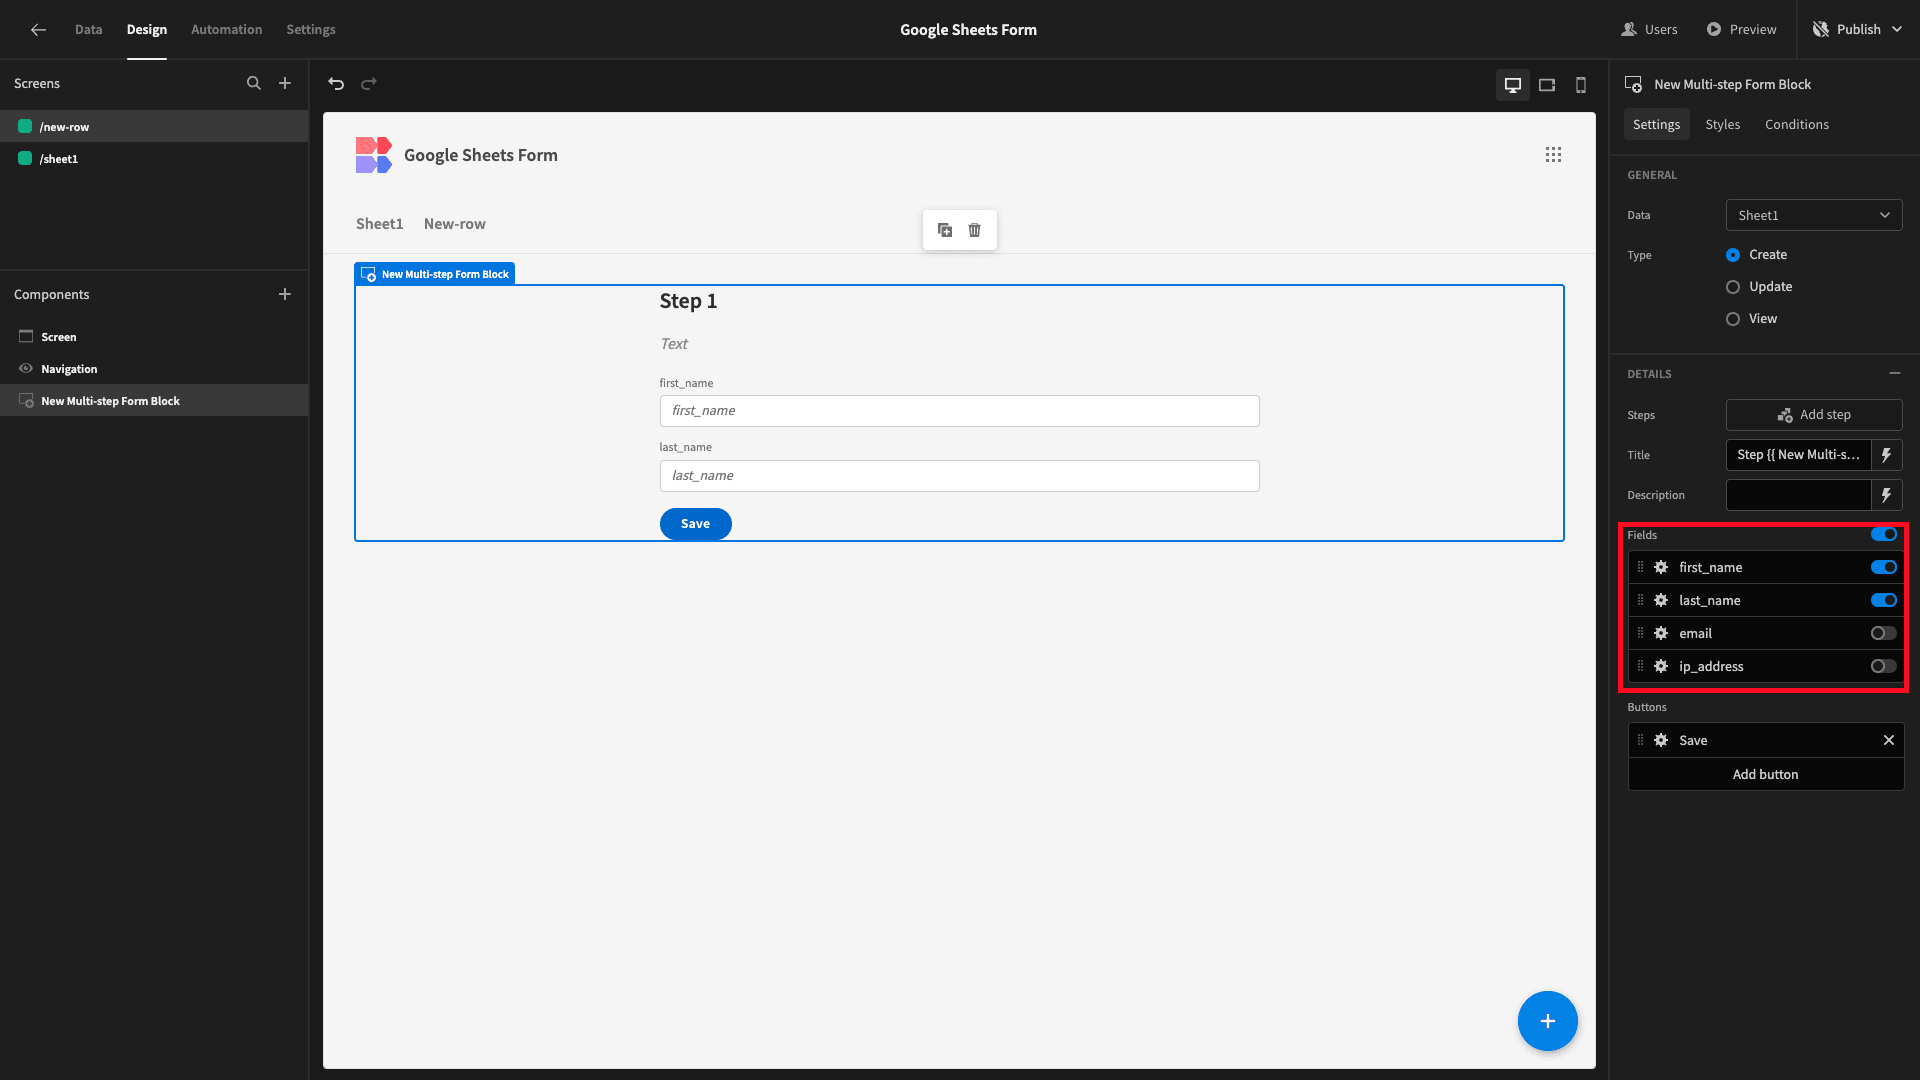
Next, we’ll add a second step:
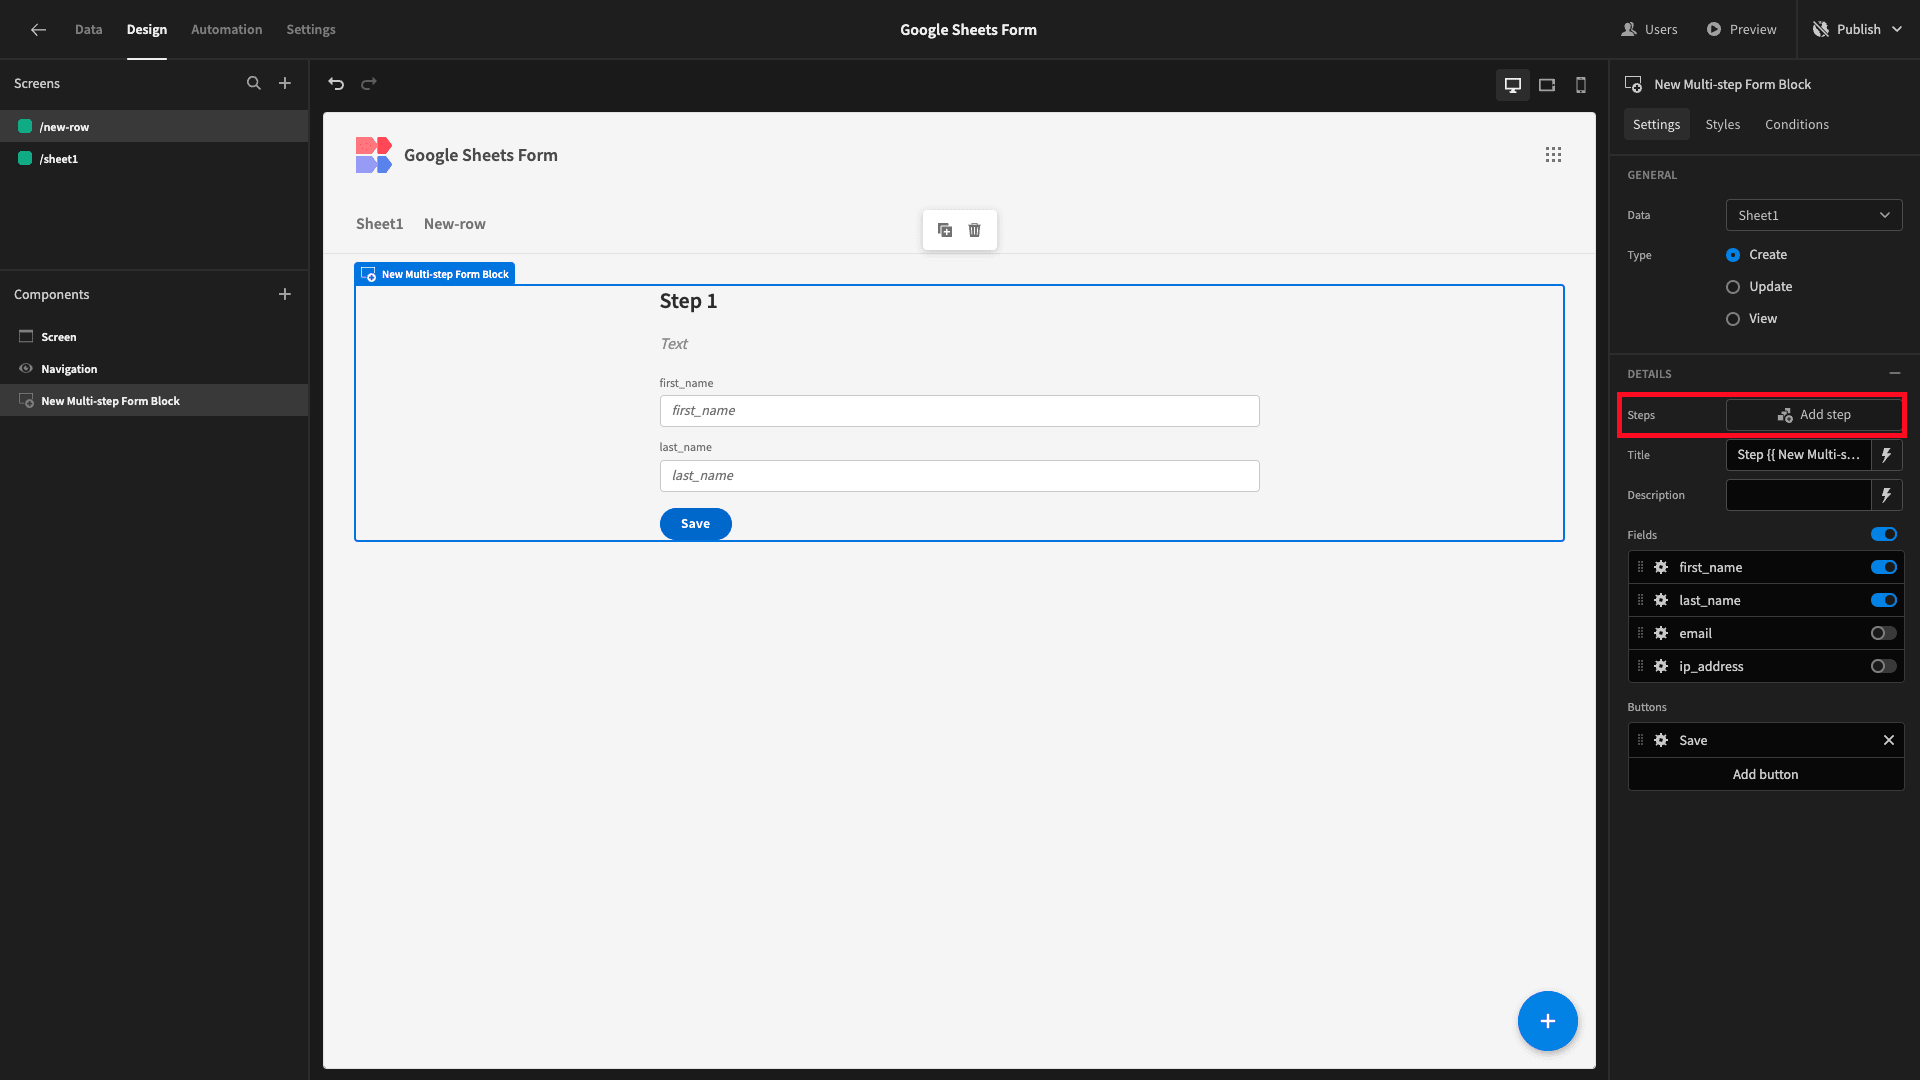
And set it to display our two remaining fields:
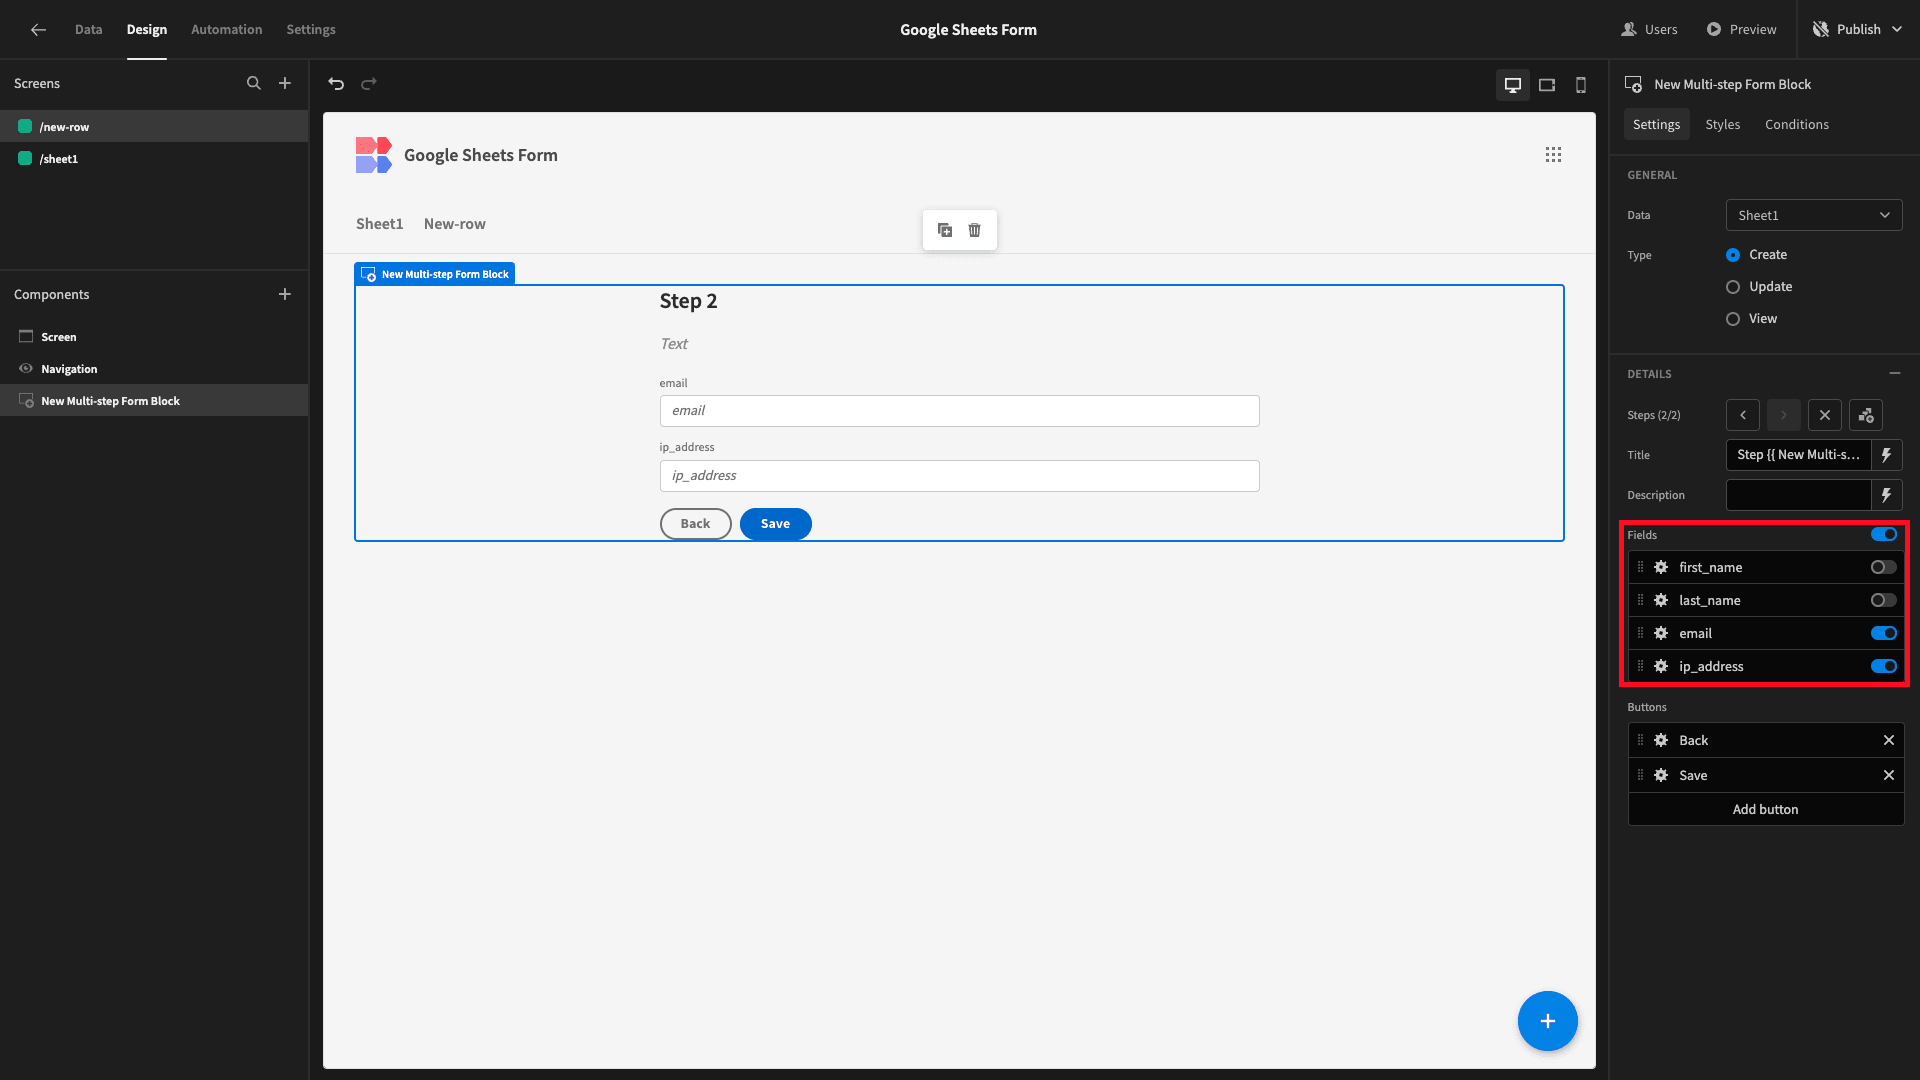
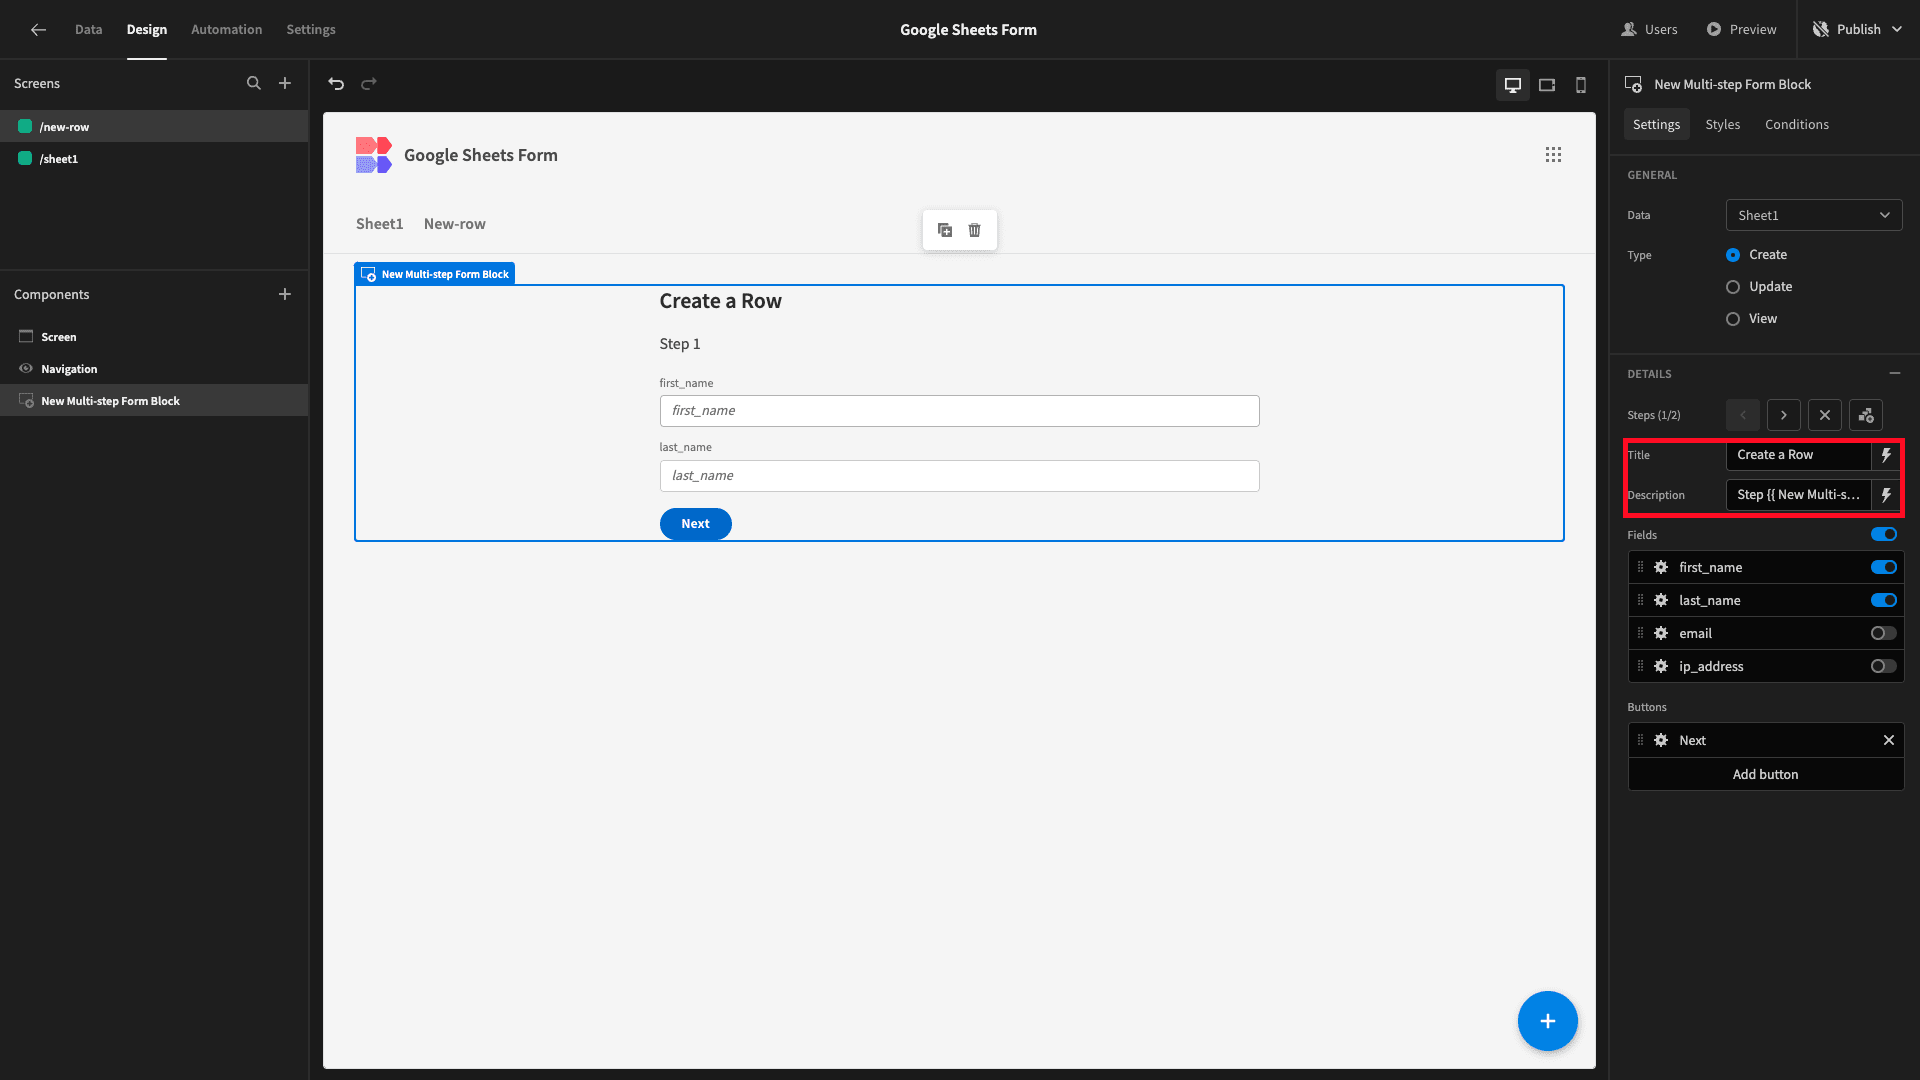
Currently, the title displays the current step. We’re going to cut and paste this to the description field instead and then give our form a more descriptive title.
The last change we’ll make for now is to reposition our buttons. Under style, there’s a dropdown selector, where we can move these up to be inline with our title:

5. Assign access levels
One of the big reasons that you’d want to create a dedicated form to enter Google Sheets data is to tightly control how different kinds of users interact with your data.
Say, we wanted certain colleagues to enter data into our spreadsheet - but we only wanted more experienced team members to be able to view and edit entries.
We can easily achieve this using Budibase’s built-in role-based access control.
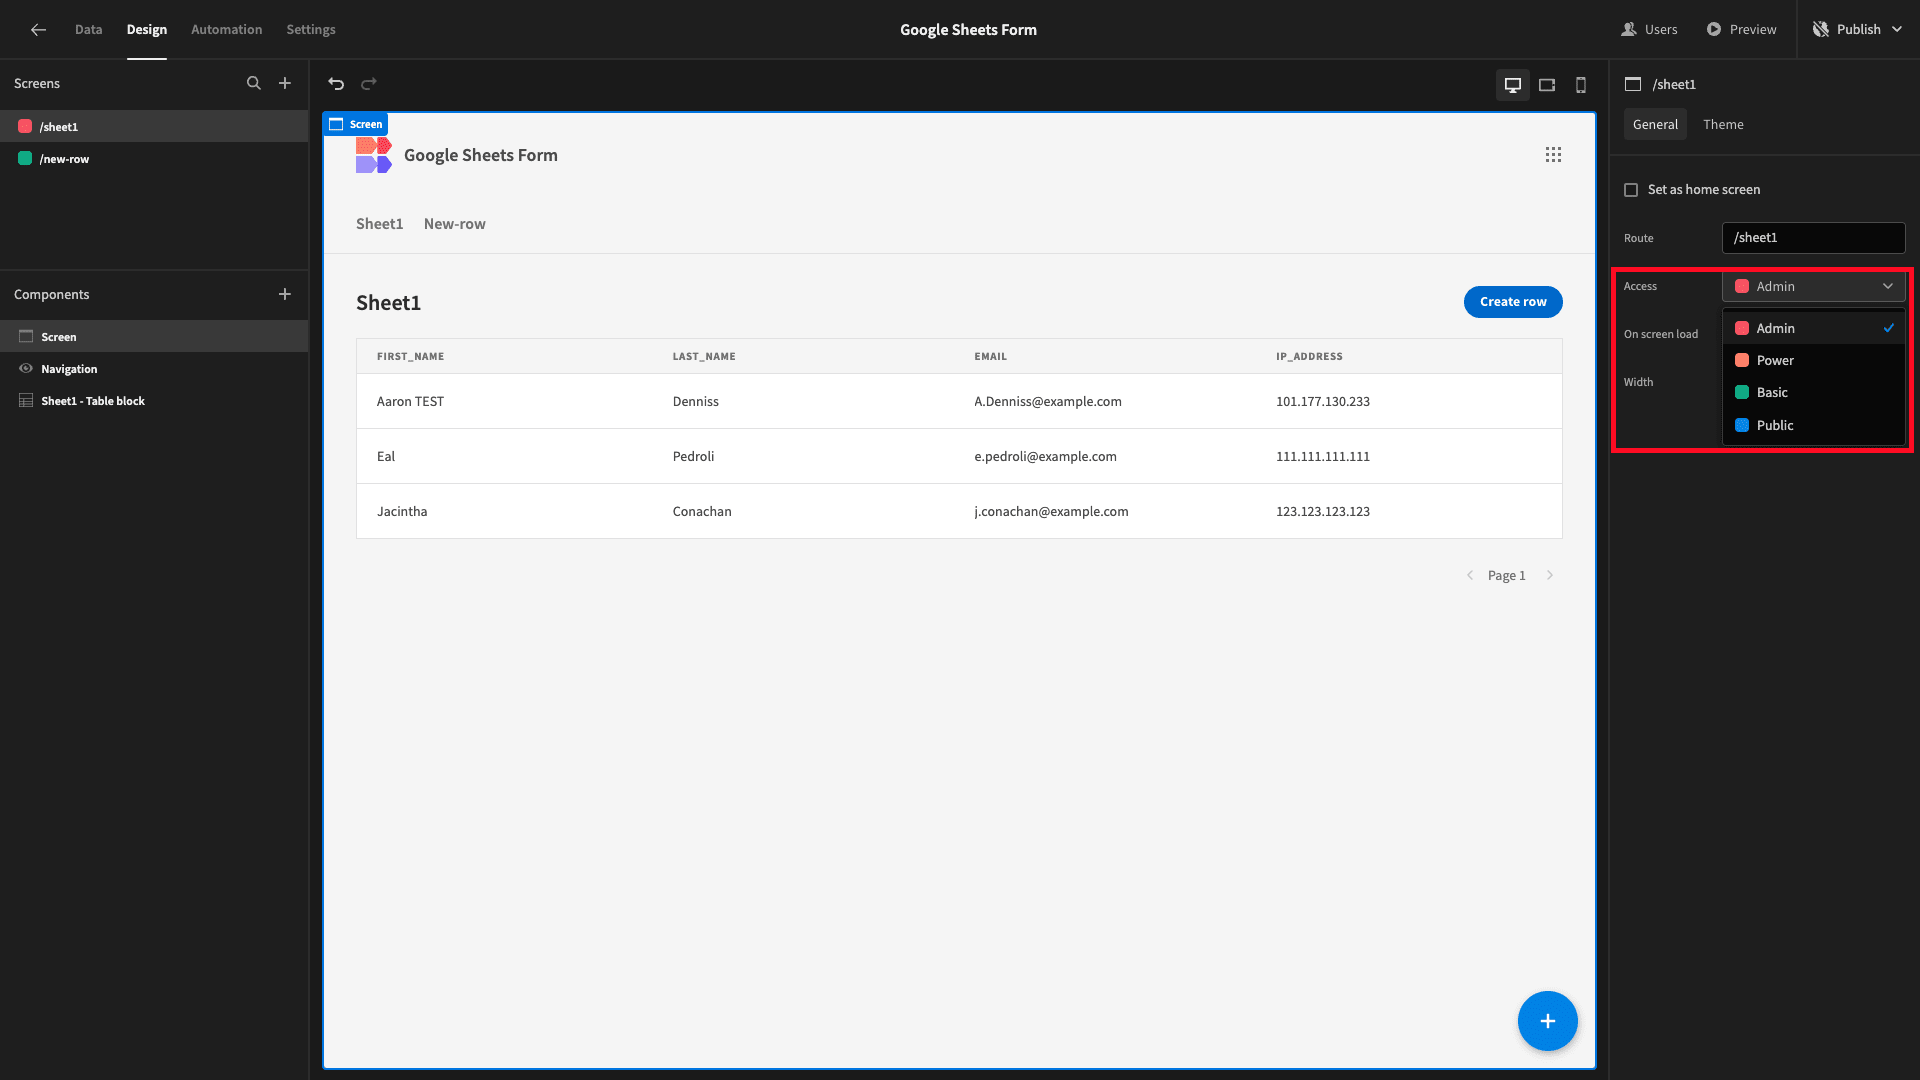
We’re going to use two access roles to show off how this works. Basic users will be able to access and use our data entry form. Admin users will have full access to this plus our table view, with the update form.
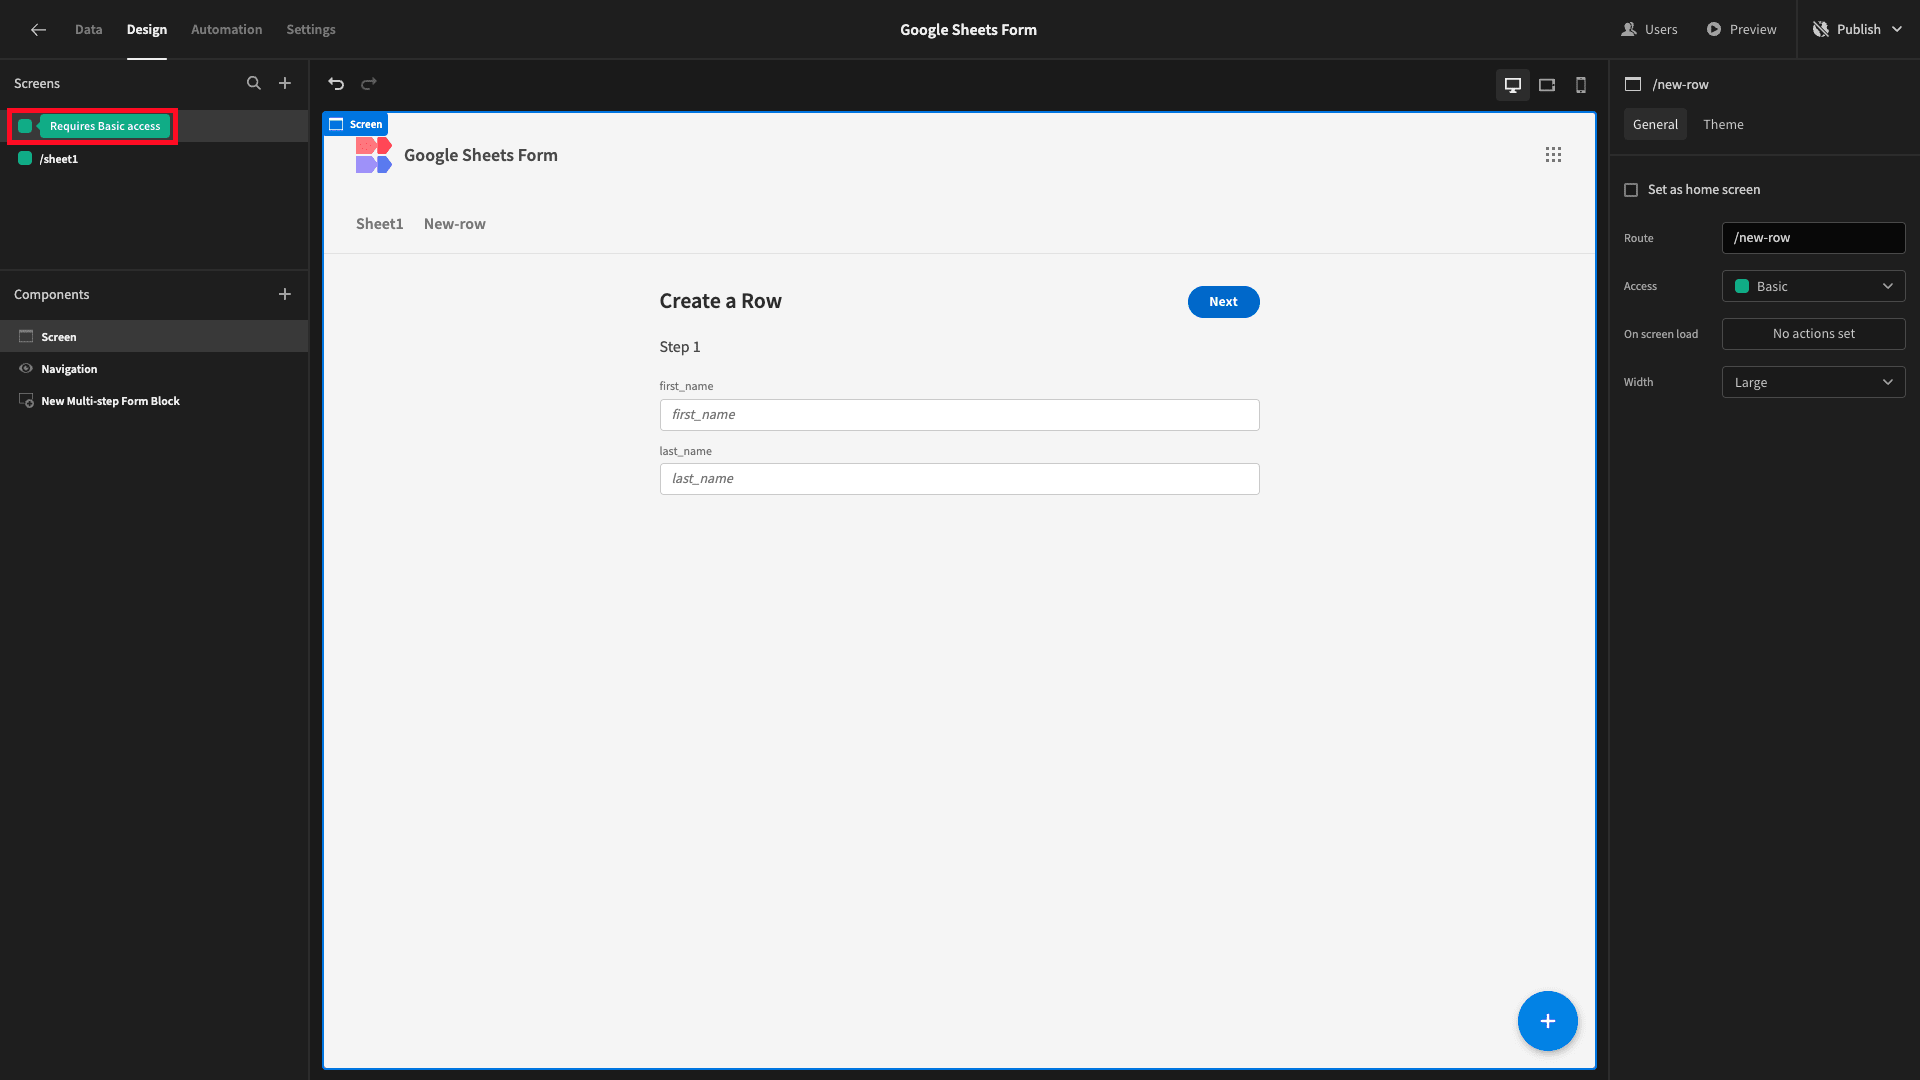
By default, all screens are assigned to the Basic role, unless we choose a different one:
We’ll use the access drop-down to set our table screen to Admin:
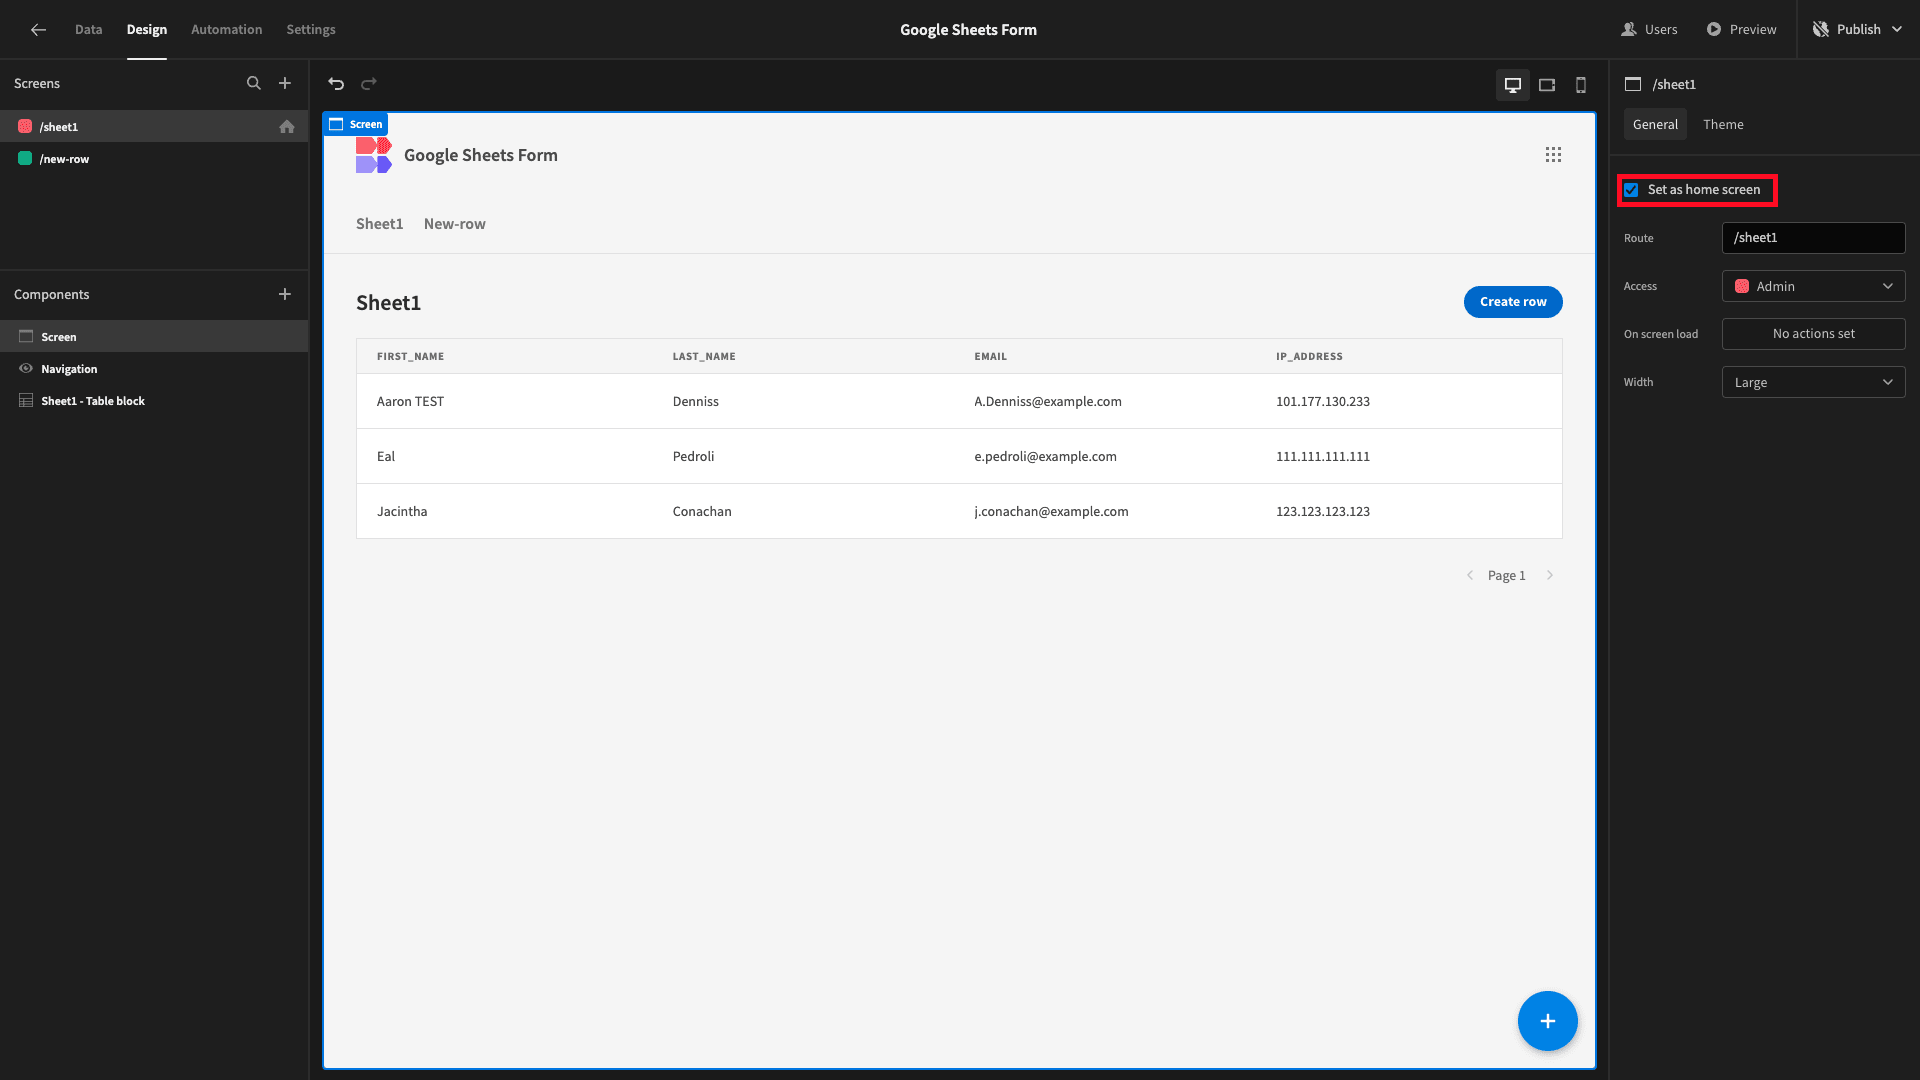
Then, we’ll check the set as homescreen option on both screens, to set them as the primary screen for each respective role:
6. Customize your design and UX
Now we have totally functional forms to enter Google Sheets data or update existing entries. If we wanted to, we could push this live as it is. But, we want to make a few tweaks to our app design to improve user experiences.
We’ll start with in-app navigation.
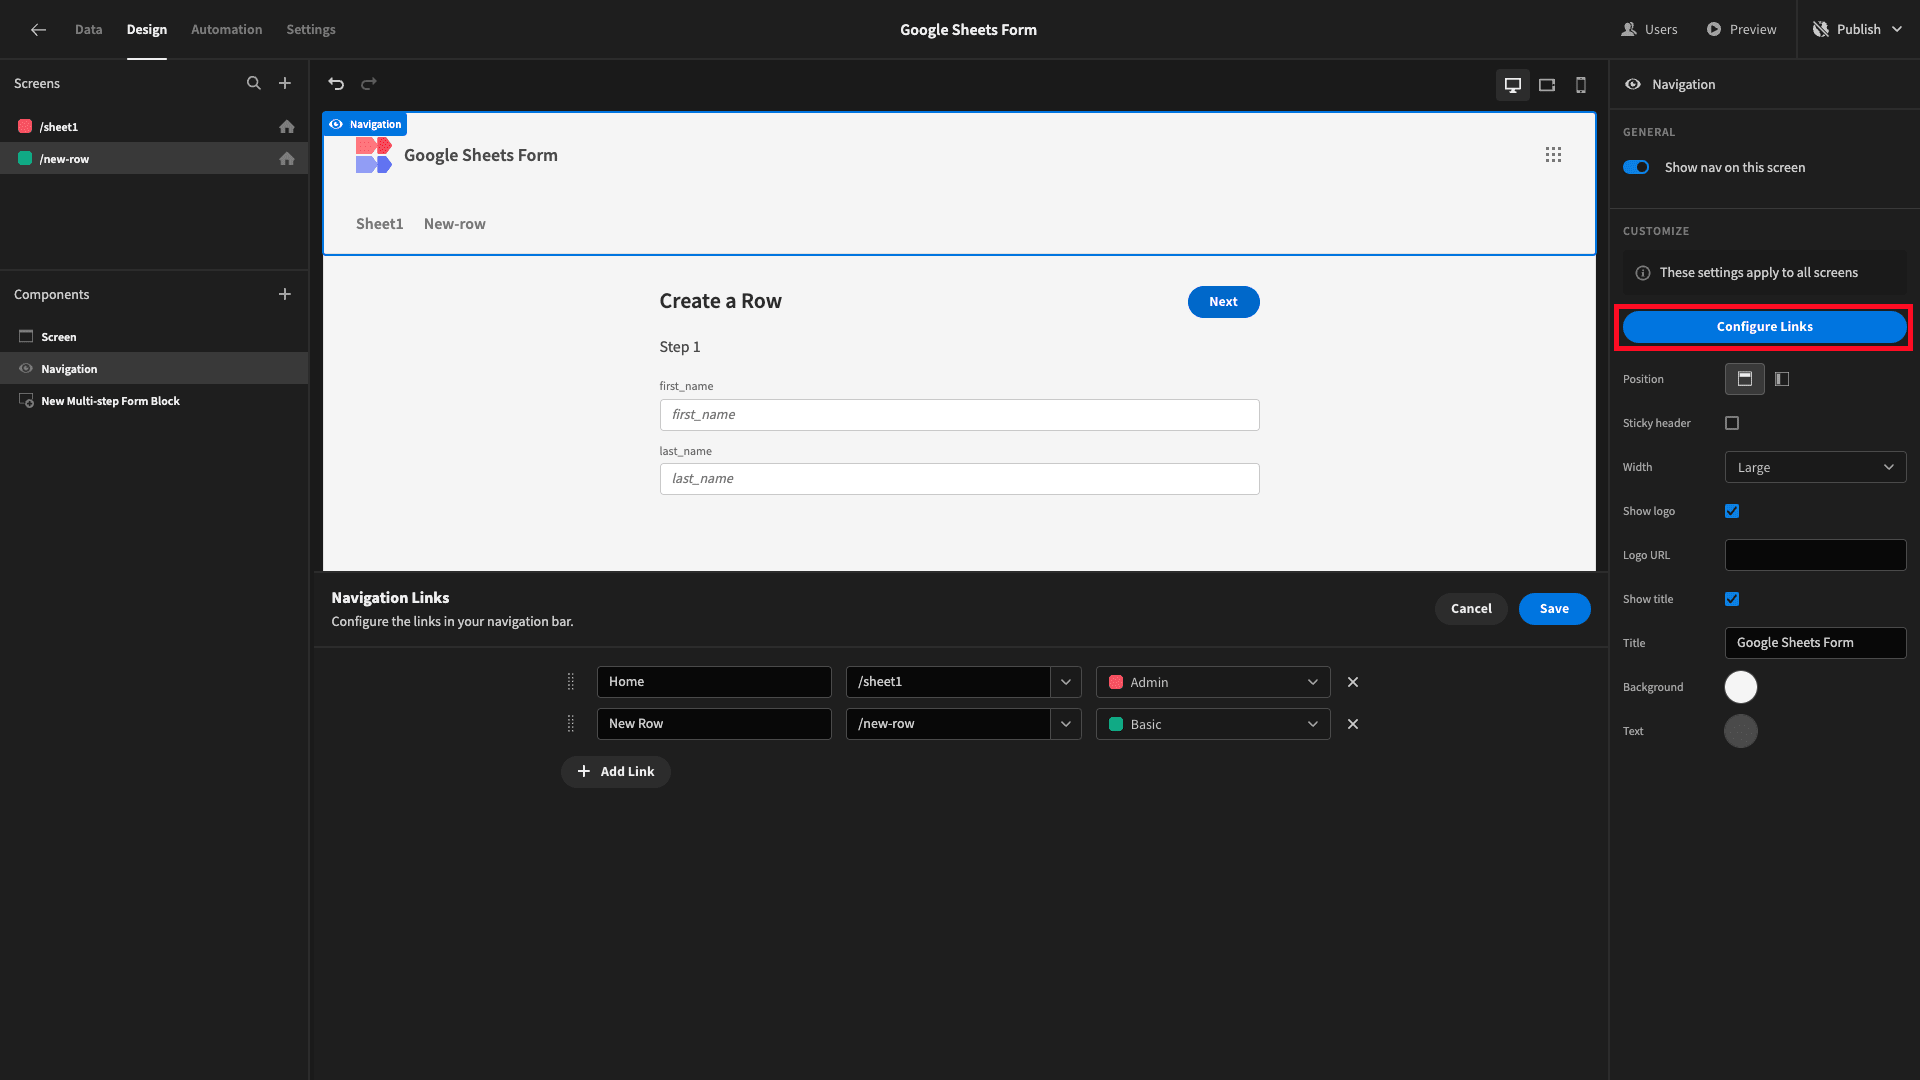
Under configure links, we can update the text that’s displayed in our nav bar for each of our pages - as well as setting the minimum role required for these to be displayed to users:
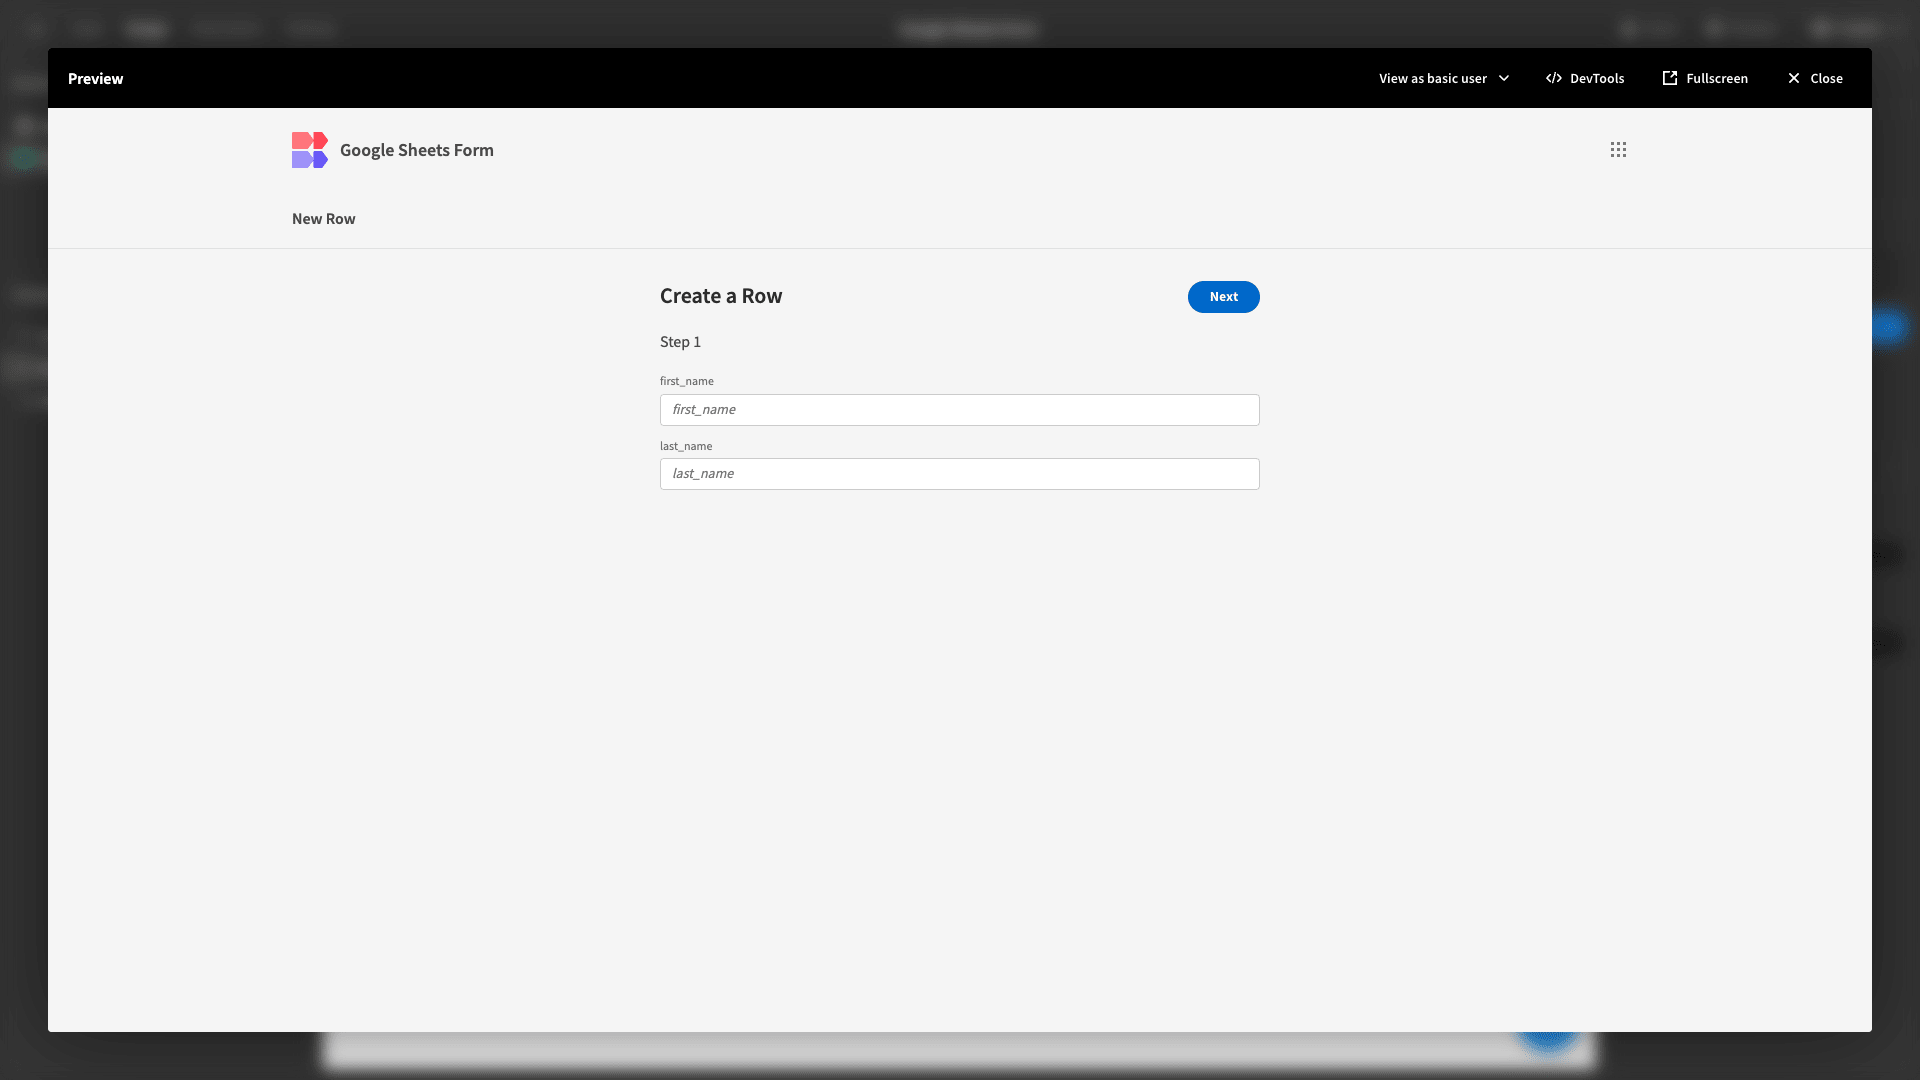
Here’s what this will look like to a Basic user:
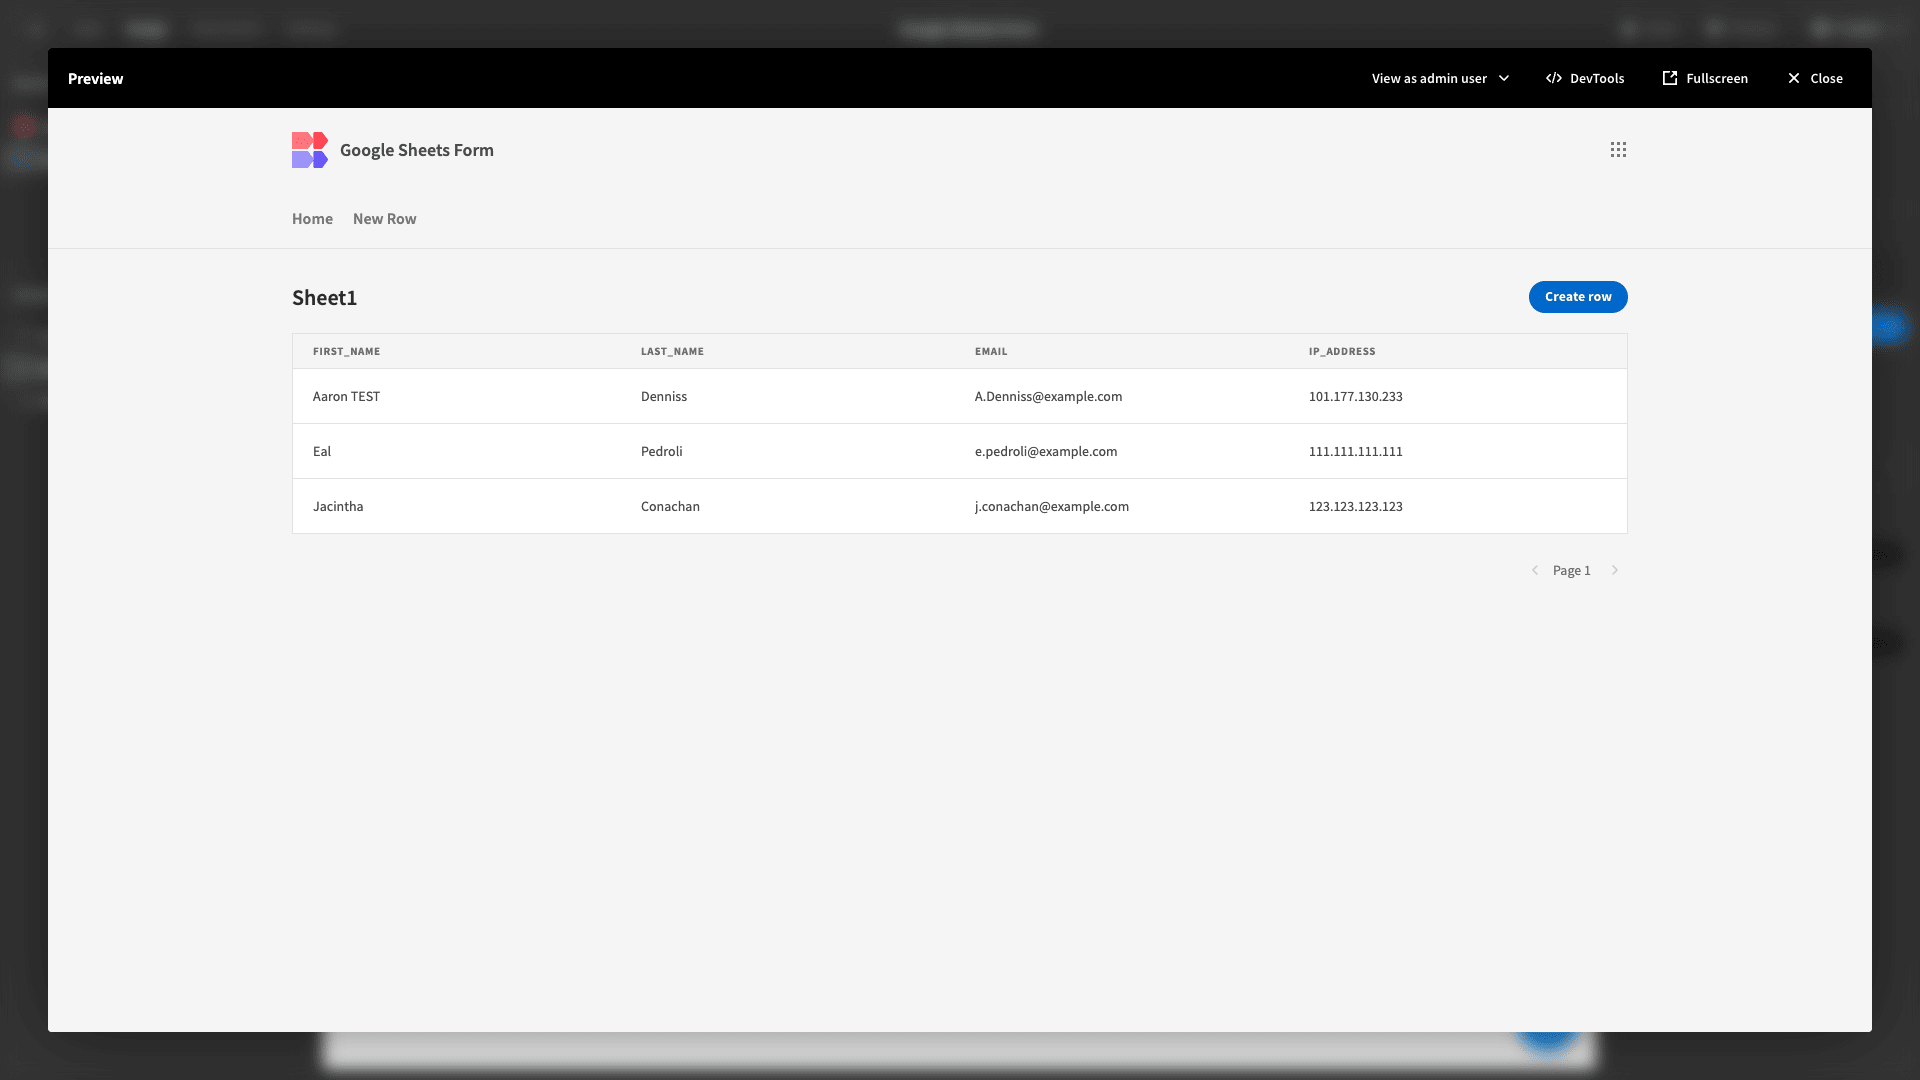
And for Admins:
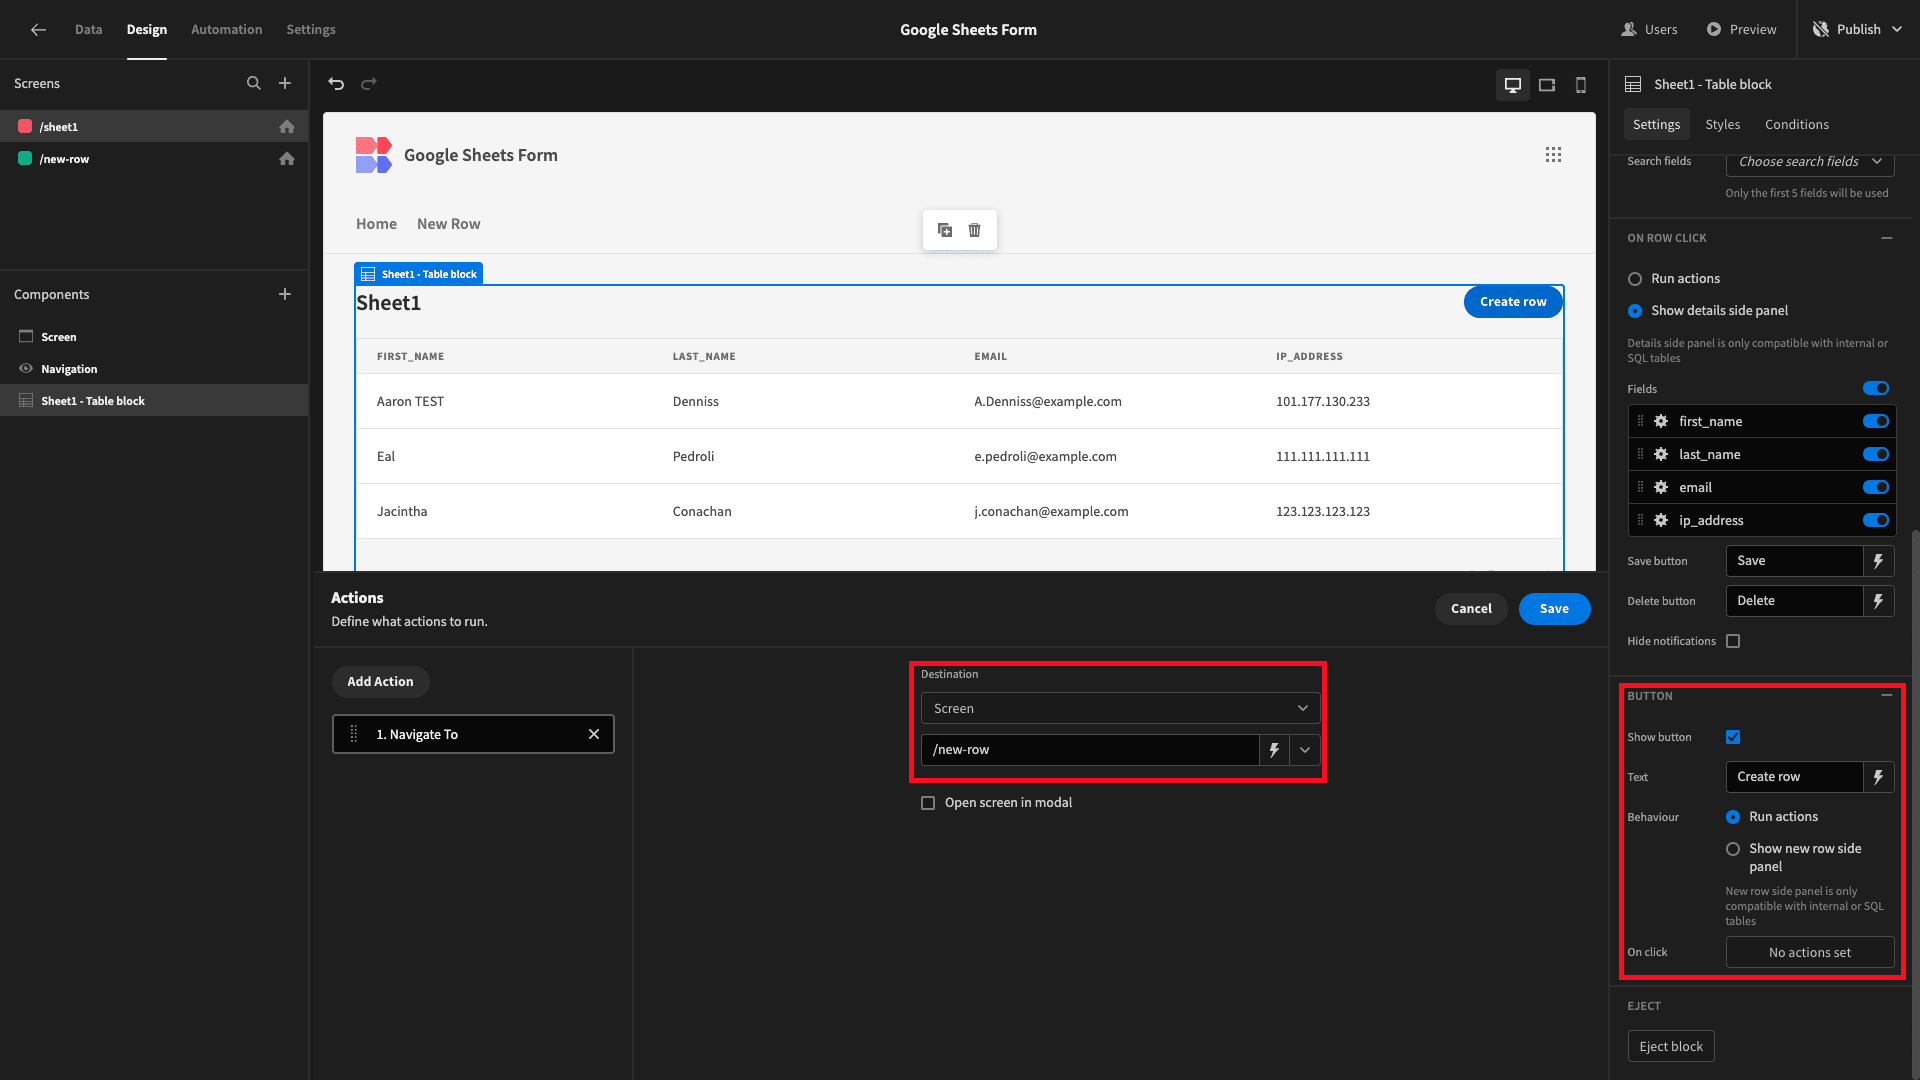
Remember, the Create New button on our table screen still opens a side panel with a pre-build form on it. Our next task is to update this so that it navigates to our custom form screen.
We can configure this using the button settings within the Table Block component on this screen - adding a Navigate To action:
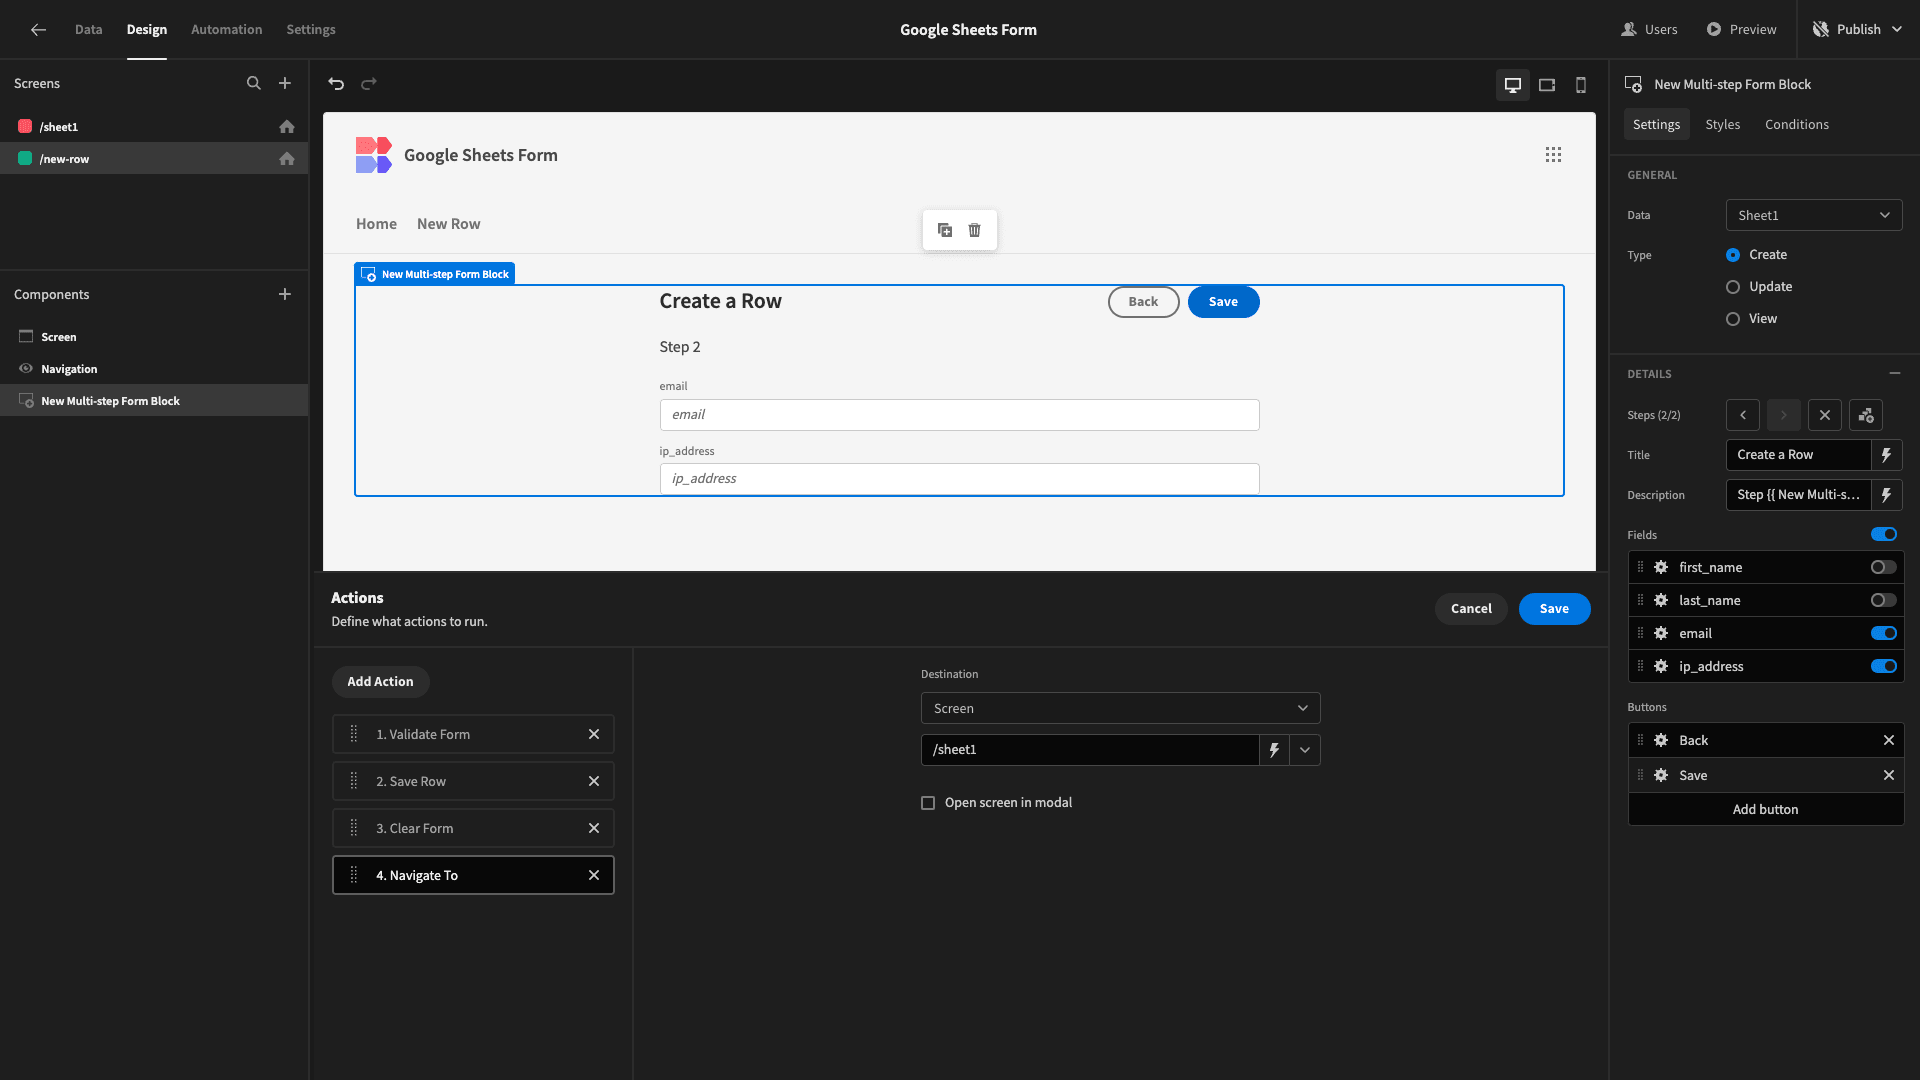
Similarly, we’ll set the Save button on our form screen to navigate back to the table UI:
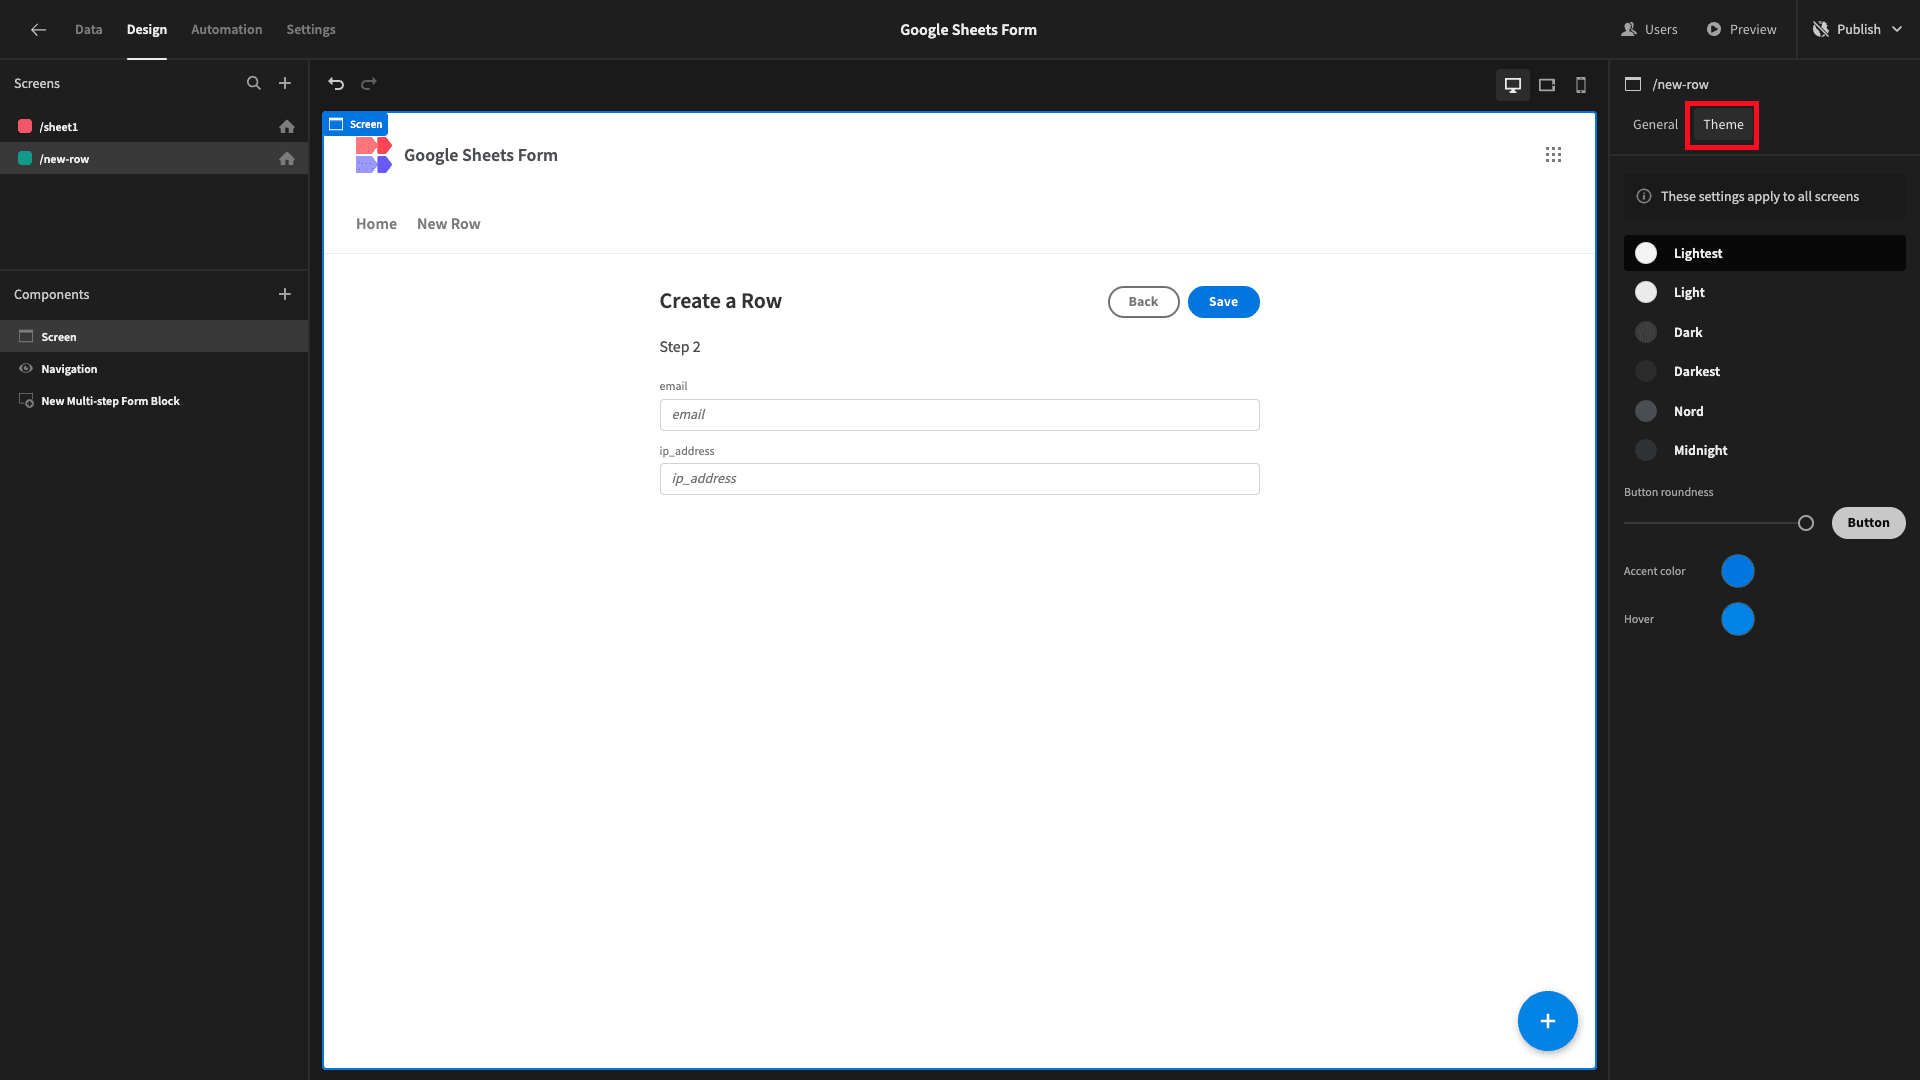
Lastly, we’re going to make a couple of tweaks to the appearance of our app.
First, we’re going to set our theme to Lightest:
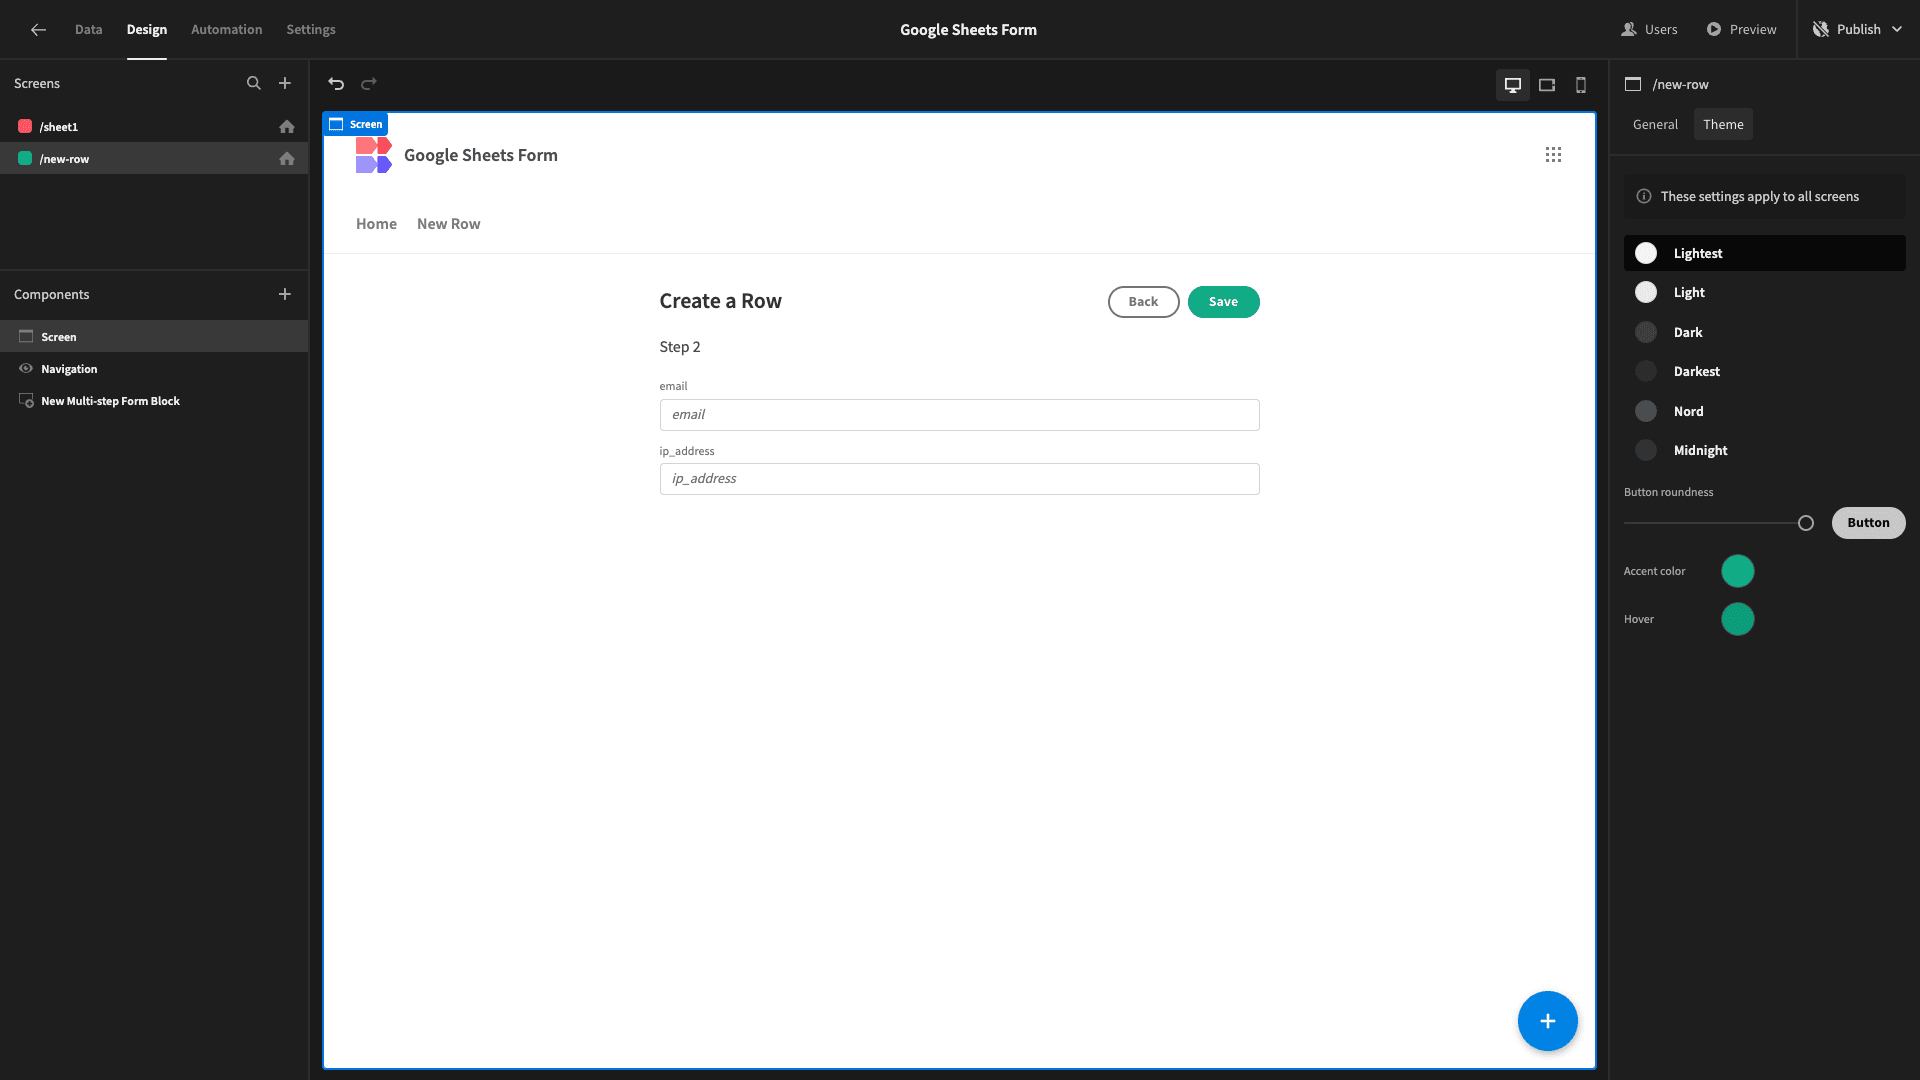
And lastly, we’ll set our button colors to green, just as a little visual nod to Google Sheets:
7. Publish your app
Finally, when you’re happy with your app, it’s time to push it live. As ever, with Budibase, you have a few different options for how you deploy and host your apps. On the one hand, you can deploy to Budibase Cloud, in just one click and let us worry about everything.
Or, if you prefer, you can deploy to your own infrastructure with Kubernetes, Docker, Docker Compose, Digital Ocean, and more.
This may not seem like the top priority when using a form to enter data to Google Sheets, but there are countless situations where how you host your tools plays a critical role.
For example, you might want to introduce extra levels of security, monitoring, or other measures.
Or you might simply have your own infrastructure and want to use it. As the leading open-source, low-code platform , our goal is to give you the tools you need, whatever your specific use case.
Here’s what our finished app looks like:
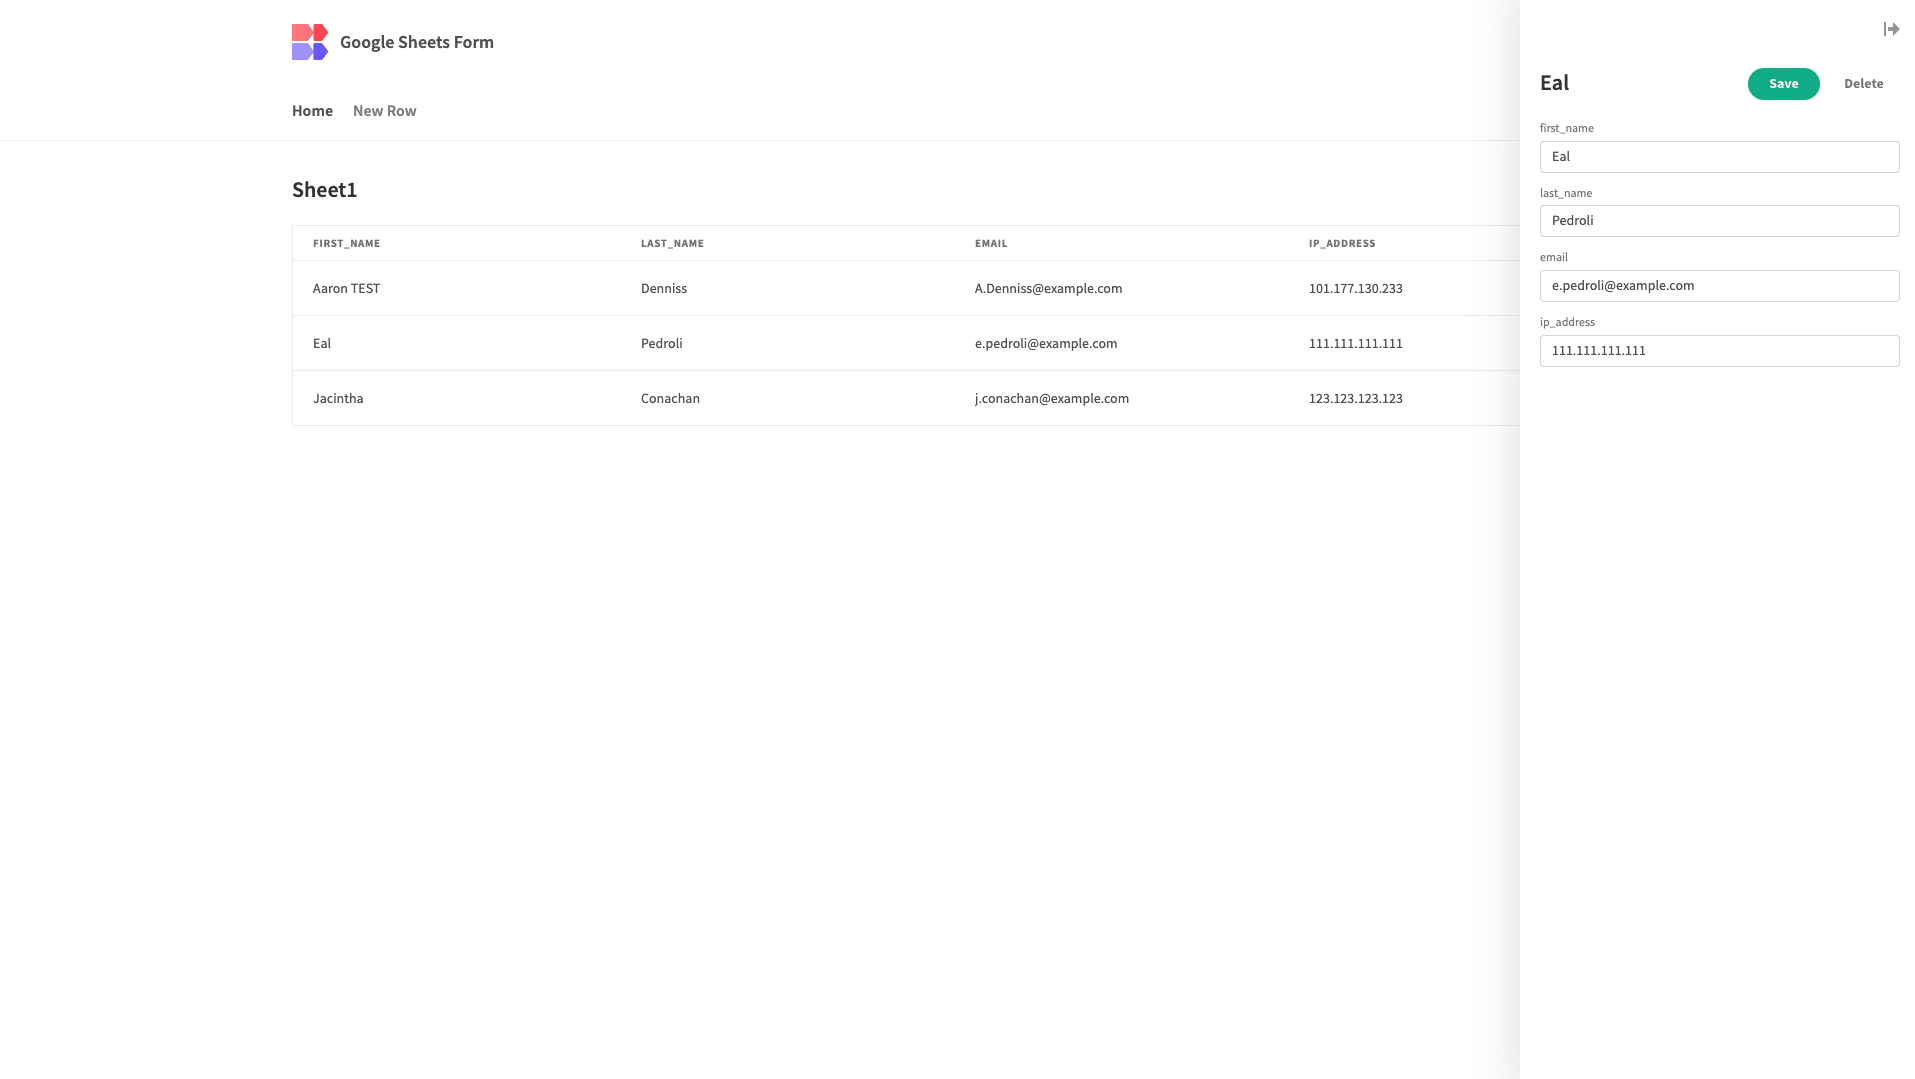
We can use it as a standalone web app or use an iframe to embed it in an existing webpage or application.
The smart option for using a form to enter data to Google Sheets
Budibase is the fast, easy way to build all sorts of custom solutions. Our intuitive low-code tool is the perfect solution for internal tools , customer-facing apps, dashboards, and more.
The vast majority of apps that businesses use are simple interfaces on top of a data source.
We’re on a mission to create the world’s largest ecosystem of open-source tools. Budibase is the smart way to create custom solutions for a whole range of business problems.
Sign up today for free to start building your own incredible, low-code solutions.
Or, check out our library of free, deployable app templates to see more of what Budibase can do.